|
|
#1 |
 Join Date: Jun 2012
Location: PA
Posts: 770
|
Go and see my Improved #8 Spark Plug Change Out The Dreaded #8 Plug Improved
Last edited by vilant; 10-30-2012 at 01:00 PM. Reason: changed link and images |
|
|

|
|
|
#2 |
|
Banned
BANNED
Join Date: Oct 2006
Location: MD
Posts: 3,674
|
Joe,
you need to use photobucket.com (img) Great writeup!!!!!!!  David |
|
|

|
|
|
#3 |
 Join Date: Jun 2012
Location: PA
Posts: 770
|
|
|
|

|
|
|
#4 |
  Join Date: Feb 2010
Location: Pendleton, IN
Posts: 3,899
|
Taking the small cover off the top of the AC box is pretty easy once you've done it once or twice.
__________________
1988 KOH Prototype EX5023 sold 1990 ZR-1 #444 Convertible 1990 ZR-1 Black #966 1991 ZR-1 Quazar Blue #296 1957 Duntov SS Project Last edited by Blue Flame Restorations; 10-29-2012 at 01:05 AM. |
|
|

|
|
|
#5 | |
 Join Date: Jan 2009
Location: Portland Oregon metro area (Washington side)
Posts: 3,193
|
Pretty much exactly how I've been doing this too over the years.
Except I just create the assemblage to get it out and then just reveres it to put in the new one. I use some black tape to hole the new plug to the socket when inserting. Quote:
__________________
Scott Vett owner since 1979._It's about the car and the people |
|
|
|

|
|
|
#6 | |
 Join Date: Jun 2012
Location: PA
Posts: 770
|
Quote:
|
|
|
|

|
|
|
#7 |
 Join Date: May 2007
Location: Westminster, Maryland
Posts: 3,684
|
Thanks for the great write up and taking the time to photograph everything.
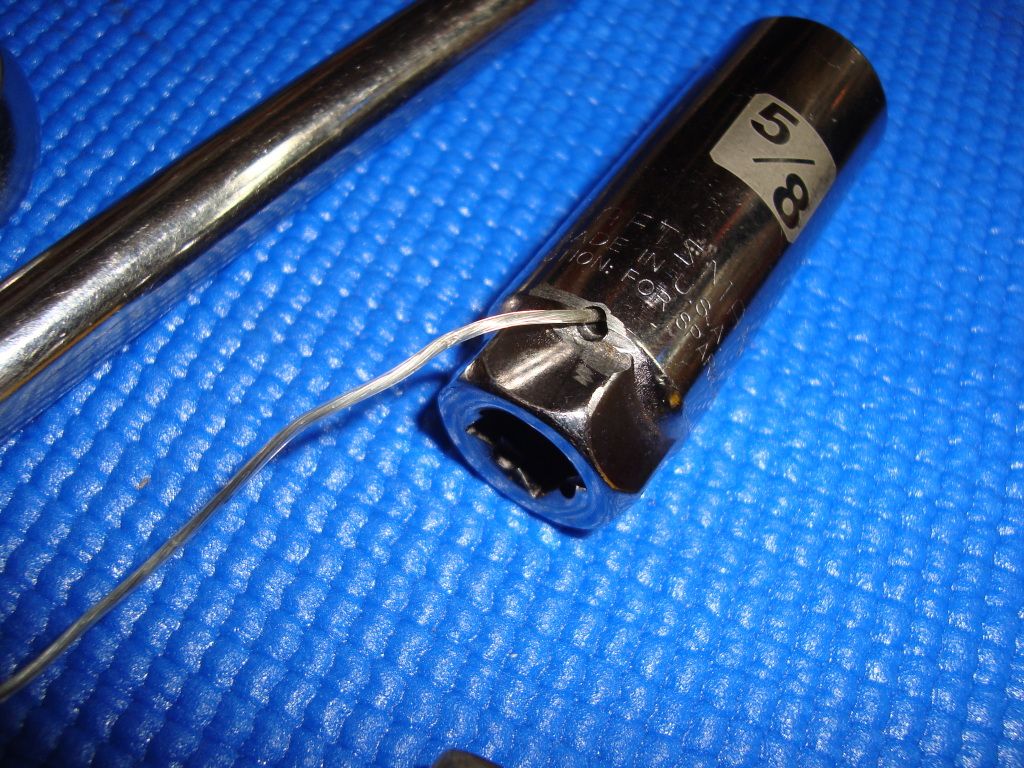
I modified a spare spark plug wrench to solve the same problem. I drilled a small hole at an angle through the base of the socket. Then I threaded through a length of flexible wire with a crimped ball on the end:   The flexible wire allows the socket to be pulled out of the head and each extension removed. The only complication is that the wire winds around the wrench as it is screwed or unscrewed. It is not too hard to keep it out of the way. The duct tape on the universal joint extension allows motion but keeps the socket align to allow addition of extensions. Jim |
|
|

|
|
|
#8 |
 Join Date: Aug 2006
Location: McLean, VA
Posts: 3,738
|
|
|
|

|
|
|
#9 | |
 Join Date: Jun 2012
Location: PA
Posts: 770
|
Quote:
 . .
|
|
|
|

|
|
|
#10 | |
 Join Date: Jan 2009
Location: Portland Oregon metro area (Washington side)
Posts: 3,193
|
Quote:
If you lower it in the hole then hold it with one hand you can insert the 3in extension with the other. Then lower that assembly and hold it while inserting the next piece etc. Finally the ratchet.
__________________
Scott Vett owner since 1979._It's about the car and the people |
|
|
|

|
 |
|
|