
|
 03-20-2016
|
#1 |
 Join Date: Jul 2015
Location: Indianapolis
Posts: 162
|
Hello all!
Sorry if this is posted somewhere and I just can't find it, but I'm trying to figure out if there is a commonly accepted practice to changing the oil cooler lines. I looked through a lot of Dynomite's stuff and there is a great article on how to make your own braided metal hoses (Jerrys Gaskets looks like they have some really nice Oil Cooler line hoses), but I did not see the process for changing the parts on the car. This of course, is assuming there is more to it than draining the oil, and just changing the parts.... If that's the case, no problemo. I just wanted to check. Thanks in advance! Marc
__________________
--Marc 1990 ZR-1 #2530 Gone but not forgotten: 1988 Z52 4+3 1992 LT1 6 speed |

|

|
|
03-20-2016
|
#2 | |
  Join Date: Aug 2009
Location: South Dakota/California
Posts: 3,797
|
Quote:
Do NOT Drain any oil. There will be some oil in oil cooler hoses. There are two "O" rings on the oil cooler dual flange.  . .
__________________
Left Clickable links -Solutions- LT5 Modifications/Rebuild Tricks Low Mileage ZR-1 Restoration 1990 Corvette (L98) Modifications LT5 Eliminated Systems LT5 Added Systems LT5/ZR-1 Fluids 1995 LT5 SPECIFIC TOP END REBUILD TRICKS Last edited by Dynomite; 03-21-2016 at 02:33 AM. |
|
|
|
|
|
03-21-2016
|
#3 |
|
Join Date: Nov 2011
Location: Dunbarton NH
Posts: 7,413
|
Didn't Jerry have some of these made up?
|
|
|
|
|
03-21-2016
|
#4 | |
|
Join Date: Jul 2015
Location: Indianapolis
Posts: 162
|
Quote:
Thanks Dynomite! You are a Hero among Men for all of your knowledge and documentation! Assuming my parts get here, I know what I"m doing this weekend!
__________________
--Marc 1990 ZR-1 #2530 Gone but not forgotten: 1988 Z52 4+3 1992 LT1 6 speed Last edited by BlackSheepz; 03-21-2016 at 08:24 PM. Reason: Grammar |
|
|
|
|
|
03-21-2016
|
#5 |
 Join Date: Jan 2006
Location: Niceville
Posts: 997
|
Sometimes the oil pump side causes the threaded fitting to back out of the pump. May have to put a wrench on the nut coupling and tap wrench with a hammer to break nut loose.
Ted This isn't clear until you do it...sorry. |
|
|
|
|
04-04-2016
|
#6 |
|
Join Date: Jul 2015
Location: Indianapolis
Posts: 162
|
Thought this was due for an update. Sorry if this seems boring to you since this is in theory a 30 minutes job but not to spoil anything, it took me a little longer than that....
----- OK, so first off I was super impressed with Jerry's Gaskets shipment of the oil cooler lines that they sent me. Awesome looking lines, parts all separated into their own bags with part numbers and sizes on them in the event that one got lost or ect. It even came with a printout of instructions including all the tools I would need, and photos to go along with it. Says at the top, this should take 30 minutes if you have the right tools. Sweet! It took me 6.5 hours. Weekend#1 (3.5 hours) After letting the car sit for a few days (she isn't a DD) I started the process. All the hoses came off everything looked good, and I cleaned up as much oil as my hands could get to. Unfortunately he fittings going from the engine to the lines were absolutely stuck. Stuck like Hercules himself tightened the damn things to the engine block. After 3 trips to the store, not even a 1-1/8 DEEP socket and a 3' pipe along with a healthy dose of liquid wrench was enough torque to get the first one off. At this point I realized I was starting to deform the fittings instead of remove them. After calling Ted Dempsey and David Hetrick (who are both incredible whom you should shake hands with if you ever meet them) I played with it some more before giving up and putting the original parts back on. Car started up, leak was still where it always was. That was the good news. 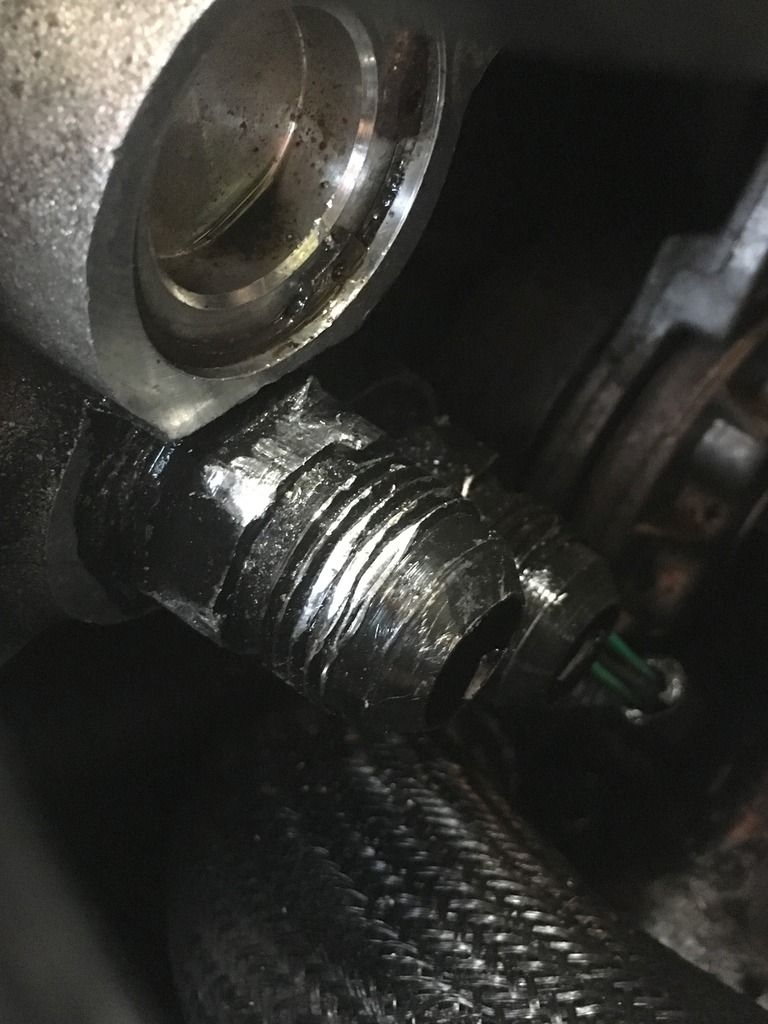 Weekend #2 (yesterday, the next 3 hours). After talking to David and Ted, the thought process was that instead of doing the repair cold as Dynomite suggested; I needed to warm the engine up to temp and then do the repair. (This of course was preferential to using a torch to heat the parts). SO I started the car, let her warm up to temperature and then dove in. Again, the hoses came right off, and this time after again a significant effort the fittings to the engine did as well. VICTORY. Well. Almost. After the fittings came off, I followed the directions provided. Oiled the threads, little bit locktite and hand threaded them until tight then tightening with the wrench. The next step was to attach the longer of the two hoses to the bottom. One was about 1/2" longer than the other and after thoroughly making sure I had the correct one I attached it. Then the top. This is where my next problem came into play. The hoses were probably about 1/2"-1" too long. I couldn't get the hoses to bend into place to where I could attach the adapter to the oil cooler. It didn't matter what I did. I took the hoses back off, re attached everything, re confirmed the length of the hoses. Didn't matter how hard I pushed or twisted. So I did the unthinkable, I installed them in the reverse order. I put the gaskets in place, and ratcheted the adapter to the oil cooler. I then fed the hoses into the engine block requiring a coat hangar wrapped in duct tape to pull on the lines to keep them going straight into the block while I tightened the hoses. I was finally done. I started the car. She was dripping oil from the upper hose going into the oil cooler. I tightened it, took it for a quick drive and everything seemed fine. After cleaning up any oil that missed the oil pan or the cardboard under car I parked her again to notice she was still dripping oil. The engine was still close to temperature so I decided to wait until today when I knew it would be cold in good ol Indiana to tighten the bolts again. Once the bolts were tightened, I then started her up. Not dripping a single drop. Backed her into the driveway, changed out the cardboard in the garage under the car, let her run for about 15 minutes and parked her again. No oil in the driveway. What a relief. 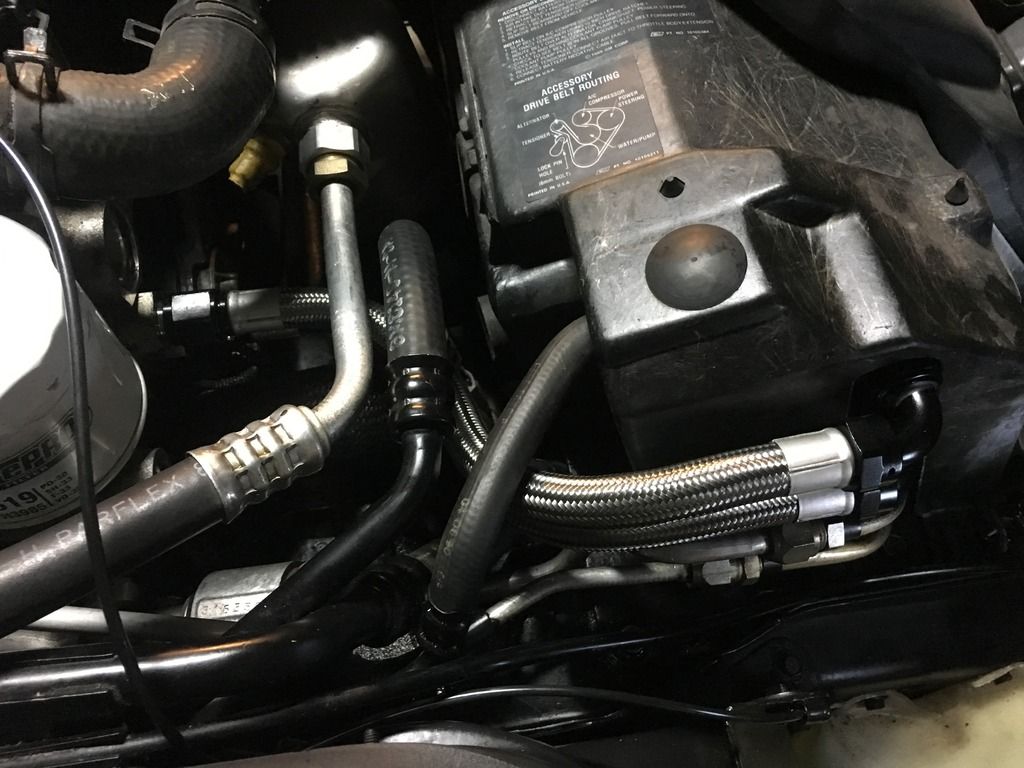 On a side note, Demps would be happy to know that while I was doing this I bumped a vacuum line. It fell apart. I put it all back together, tightened it and this solved my vacuum leak (well sort of). Instead of the pump running non stop it runs for about 3 seconds, stops for 15 seconds or so, then runs again for a few seconds, and continues on that way. Again, this is instead of running non stop so I'll take it as an ancillary victory. Next up is the Injectors, but I think this weekend we'll take her out for a cruise instead of tearing her apart. Thanks again to Ted and David for the phone help! 
__________________
--Marc 1990 ZR-1 #2530 Gone but not forgotten: 1988 Z52 4+3 1992 LT1 6 speed |
|
|
|
|
04-04-2016
|
#7 |
|
Join Date: Aug 2009
Location: South Dakota/California
Posts: 3,797
|
The TRICK to Remove the 12 AN Flare Fittings
Use a 1-1/8" 12 Pt Box Wrench with another Box Wrench for leverage. The issue using a Deep Socket is that the torque is applied too far out causing the socket to twist off the fitting. With the box wrench there is no twisting off the fitting with all torque applied directly to the fitting flats. ZR1 Engine (LT5) Bolts and Hydraulics 
__________________
Left Clickable links -Solutions- LT5 Modifications/Rebuild Tricks Low Mileage ZR-1 Restoration 1990 Corvette (L98) Modifications LT5 Eliminated Systems LT5 Added Systems LT5/ZR-1 Fluids 1995 LT5 SPECIFIC TOP END REBUILD TRICKS Last edited by Dynomite; 04-05-2016 at 01:03 AM. |
|
|
|
|
04-05-2016
|
#8 | |
|
Join Date: Jul 2015
Location: Indianapolis
Posts: 162
|
That's a GREAT tip Dynomite!
Unfortunately the damage I did in the first photo was from a box wrench. Open end. I tried the closed end also but no luck there either. That's why I bought the deep socket, and in the end the socket on the second day is what got the flare fitting off the engine while hot. (I did try the box wrench again with the engine hot, but no luck there again). I appreciate the suggestions Dynomite, your technical articles are second to none and I've been reading your fuel injector stuff like crazy! Thanks Again! Quote:
__________________
--Marc 1990 ZR-1 #2530 Gone but not forgotten: 1988 Z52 4+3 1992 LT1 6 speed |
|
|
|
|
|
04-05-2016
|
#9 |
|
Join Date: Jan 2006
Location: Niceville
Posts: 997
|
Glad it's fixed--both the oil leak & vacuum.
Injectors are fun. Be careful with all of the brittle "stuff". Ted |
|
|
|
|
11-12-2016
|
#10 |
|
Join Date: Sep 2012
Location: Rockwall, Tx
Posts: 1,510
|
I started putting my hoses on tonight and ran into the same issue with the fittings being incredibly tight. I finally got them off but what's weird is when I checked the torque specs it is only 39 in lbs. I'm sure due to the aluminum. I used anti seize because of the steel fitting going into aluminum. Should I have used Loctite instead?
Also, has anyone else come across an issue of the shroud not having enough clearance for the new hoses? I'm going to have to cut or grind a relief in the shroud in order to get the hoses on.
__________________
_________________ 1994 AB/Grey #141 430 RWHP/392 RWTQ FBI Lyposuction / Secondaries relieved of duty / SW Long Tube Headers / Corsa Exhaust / FIC SS Injectors / MSD Coils / Lightweight Pulleys / Corey tuned B & M Shifter / Aluminum Flywheel / Samco Hoses / Shelby Series One's / C4 No Flex Frame Stiffener BBC - Bling By Carter: Custom ZR-1 Center Caps / Custom Plenum Plate / Air Box Knobs / TB Cover / Oil Filter Cover |
|
|
|
 |
|
|


 Linear Mode

