|
|
#31 | |
 Join Date: Nov 2007
Location: Squires (near Ava MO in the Mark Twain N'tl Forest) - Missouri
Posts: 6,466
|
Quote:
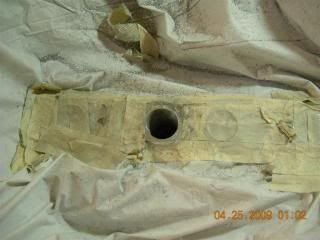
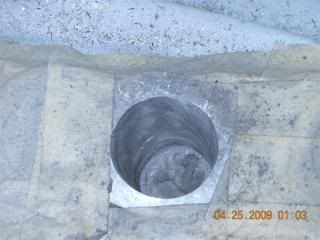
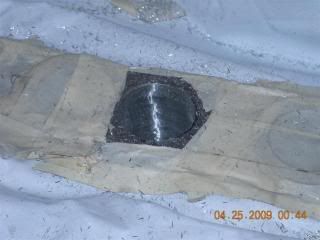
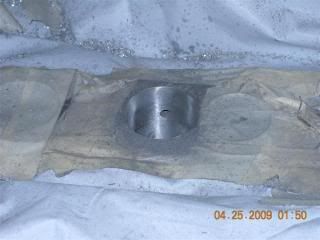
No worries about grit, if you pack the bores tight with (I used) WD40 sprayed paper (shop) towels (the thick, heavy blue ones). Paranoid, I packed each runner twice; one primary plug, and one secondary. When finished, I used a vacuum cleaner with a tube small enough to reach into the ports and pick up the bulk of the loose debris and grit. Then with a super-long set of hemostats, the packing can be retrieved, while vacuuming again before removing the second plug. Then I used fresh towels, sprayed lightly with WD40 and wiped the bore surfaces; changing towels until they came out clean. No grit! No worries! Like an surgical theater, the entire top of the engine bay is covered with a (I used a shower curtain), and everything but the port being modified is masked off...  Port "matching" in LT5 heads - in progress (note plug)  Surface left by carbide bit before sanding  Note finish imparted by the 60-grit flapwheel...  Far as "grit based" bits go, grinding bits load up almost instantly when cutting aluminum. So the cutting is via carbide bits. However, to remove blemishes and nicks left by the burr (and you will have some!), as Lee pointed out, a 60 grit flapwheel (seen in my photos in previous post on this thread) is ideal for cleaning those up and imparting the right amount of surface roughness to avoid boundary layer encumbrances. But, back to port matching: Just my 2-cents, but Flyin Ryan suggested to me that when it comes to changing the diameter of a runner, to prevent pulse reversion it is best to not exceed (if I recall him correctly) 4% change in diameter for a given linear distance (along the axis). (Other sources vary - one I read said 7%.) I went with 4% - less is better, in some cases - which resulted in a long taper extending from the input and narrowing to just above the valve guide. WOW! I wish like hell I had dyno'ed it at that point, cuz the seat of the pants improvement I got from top end porting alone was way beyond what I expected! There was a big improvement when I ported the heads as well, but not as much a change as I got from the top end phase - ending up at 432 rwhp, w/ stock cams, stock TB, and SW headers + X-pipe. (Someone tell me again how the stock LT5 isn't starving for air!) Prolly more than you wanted to know, but mebby somebody will be intrigued enough to consider joining the majority of the FBI gang and port their babies too! BE A WARRIOR!  P. |
|
|
|

|
|
|
#32 |
 Join Date: Feb 2011
Location: San Marcos CA
Posts: 1,786
|
^^^ The only thing I would add to Paul's post is that I port matched my primaries pretty much similarly, but I rotated the engine 90 degrees 8 times and did each port separately. This ensured that the intakes were closed on TDC just in case a chip or two got left in the port after removal of the wd-40 soaked rags. The worry wasn't a couple of bits touching the piston and blowing through, but more to keep the seats free of debris.
 The shower curtain is a good idea. A lot of time was spent on clean-up the way I did it. It was not difficult, just tedious. I was finished in about 5 hours. |
|
|

|
|
|
#33 | |
 Join Date: Nov 2007
Location: Squires (near Ava MO in the Mark Twain N'tl Forest) - Missouri
Posts: 6,466
|
Quote:

|
|
|
|

|
|
|
#34 |
 Join Date: Feb 2011
Location: San Marcos CA
Posts: 1,786
|
I saw your pic and you were working on the secondary (hmmm)... anyways, mine are still intact. Also my port job was more modest at 35-ish mm on the bottom of the I/H with just enough port matching to blend the core shift and 2 mm of size change.
I did remove my injector housings for an unrelated leak repair and took the opportunity to take a little more out of them a few months afterwords, but I feel like any more improvement would come from getting back to the plenum for a little more work there. Since I'm finally running headers, I've seen the light on top end power. |
|
|

|
|
|
#35 | |
 Join Date: Nov 2007
Location: Squires (near Ava MO in the Mark Twain N'tl Forest) - Missouri
Posts: 6,466
|
Quote:
Anyway... That's what the pix were showing: both primary and secondary ports getting "the business"...And, no steeeeking secondaries!!! P. |
|
|
|

|
|
|
#36 |
 Join Date: Mar 2013
Location: Roswell, GA
Posts: 234
|
Thanks for all the great feed back. I am looking forward to getting everything done within the next few weeks.
__________________
1995 ZR1 #159 Ported,Corsa,4.10 Rear, Dual Disc RAM Clutch, Alum Flywheel, Haibeck Chip, ZFDoc Plates, Relocated Battery 400 rwhp 1992 ZR1 #280 Ported, Locked Secondary's, Flowmaster Exhaust, Haibeck Chip, 375rwhp 1996 Collectors LT4 (Stock) 1972 Convertible 434 Small Block 572 rwhp |
|
|

|
|
|
#37 |
 Join Date: Mar 2013
Location: Roswell, GA
Posts: 234
|
Update: Finally got injector housings off and discovered why I had an oil leak, it appears a steel gasket was used...see pictures. Not sure why? I also discovered that the IH secondary ports have been opened up to just shy of 38mm. The steel gaskets are also 38mm but the head was not matched to the gasket or IH. Question: why was a steel gasket used and should I proceed with opening up the primary port on the heads to 38mm to match the IH? I will have to trim some material off the new gasket as well.
__________________
1995 ZR1 #159 Ported,Corsa,4.10 Rear, Dual Disc RAM Clutch, Alum Flywheel, Haibeck Chip, ZFDoc Plates, Relocated Battery 400 rwhp 1992 ZR1 #280 Ported, Locked Secondary's, Flowmaster Exhaust, Haibeck Chip, 375rwhp 1996 Collectors LT4 (Stock) 1972 Convertible 434 Small Block 572 rwhp Last edited by KJL; 09-30-2013 at 08:06 PM. |
|
|

|
 |
|
|