|
|
#131 |
 Join Date: Aug 2006
Location: Edmonton, Alberta or Phoenix, Arizona
Posts: 2,741
|
time to change out the rod bearings...by the looks of it...
__________________
There are no limit's mans ingenuity, just as mans ingenuity will never conquer the forces & behavior of this planet...Smokey Y. |
|
|

|
|
|
#132 |
 Join Date: Dec 2004
Location: Jacksonville, FL USA
Posts: 4,645
|
LGAFF I apologize for asking this and interrupting the flow in this thread.....
 but the condition of the rod bearings is a result of whatever the motor ingested that caused the damage to the piston tops? Was the object one of the screws from the 2* butterfly plates? Or is the condition of those bearings considered "normal wear" for the milage & use that the motor had over it's life? Jez those rod bearings don't look too great to me, scratches were from the remains of the screw(?); but the wear looks to be very uneven to my inexperienced eyes...... Thanks.  Tom
__________________
1990 ZR-1, Black/grey, #2233, stock. ZR-1 Net Reg Founding Member #316 & NCM member |
|
|

|
|
|
#133 |
 Join Date: Mar 2007
Location: Crystal Lake, IL
Posts: 7,194
|
I do not think it was the screw, based upon the condition of the sides of the piston, I do not think that the original owner liked to change his oil. To me it is just normal wear, no big gouges that I can see, etc.
But I will defer to more experienced opinions for that assessment. The screw size is too big for the 2ndry, look more like the Air Horn screw. LGAFF 92 ZR1 #234 Last edited by LGAFF; 11-02-2008 at 09:13 AM. |
|
|

|
|
|
#134 |
 Join Date: Mar 2007
Location: Crystal Lake, IL
Posts: 7,194
|
I also looked into thebearing size for the Lotus 3.4 V8, and the bearing is 64MM to our 70MM so not an option. I will look into the Chrysler bearing and update.
I did look up the old Hemi and they are 2.751 to our 2.76. LGAFF 92 ZR1 #234 Last edited by LGAFF; 11-02-2008 at 09:12 AM. |
|
|

|
|
|
#135 |
 Join Date: Dec 2003
Location: Arcadia,OK
Posts: 3,394
|
Lee,
Thanks for posting the rod bearing pictures. Here's my unsolicited analysis and comes complete with no guarantee. :-) The scratches in the bearings are from particulate in the oil, probably when the engine was new. They are virtually the same as the LT5's I've torn down, not severe. The load side of 1~6 has some blue color, indicating excessive heat on the load side. The wear pattern is normal. 7 & 8 don't show the same discoloration or wear. Can be caused by cold start & high rpm operation before reaching operating temps or oil dilution. The "speckling" best shown in the rod cap bearing of #3 & #7 are, in my opinion, due to corrosion caused by water/coolant in the oil. The engine looks to have been idle for an extended period as the crankshaft oiling hole is clearly visible on #2 & #7 and to a lesser extent on #8. The corrosion could be due to the settlement of coolant/water onto the unloaded side of the bearing during the period(s) of time the engine was not operated for an extended period. The odd bearing in the lot is the rod cap on #8. The edges of the bearing are damaged. I haven't got a clue on this except that it does occur on the unloaded side of the bearing, like the indicated corrosion on some of the other bearings. There is also a depression mark in the center of the bearing which is perpendicular to the rotation that would not have happened during engine operation. Summary: doesn't look like a high mileage engine, but does look like one that has given it's owner a good time. How's the crank? Looking forward to seeing the main bearings........
__________________
Jerry Downey JERRYS LT5 GASKETS & PARTS http://www.jerrysgaskets.com 1994 ZR-1, Black/Black, Lingenfelter Aerobody, 416cu in, 3.91 gears, coil-over susp, Brembo brakes, etc. 2016 Black-Red, 3LT-Z51 Auto 8-speed. |
|
|

|
|
|
#136 |
 Join Date: Mar 2007
Location: Crystal Lake, IL
Posts: 7,194
|
Puling the oil pump and timing gear:
Used a 2 ton 3 jaw puller, and used the crank plug from the balancer pulled to protect the crank, came off smoothly and no issues. As you can see therre is a washer behind it that slides right off, woodruff key locks it in(gear). 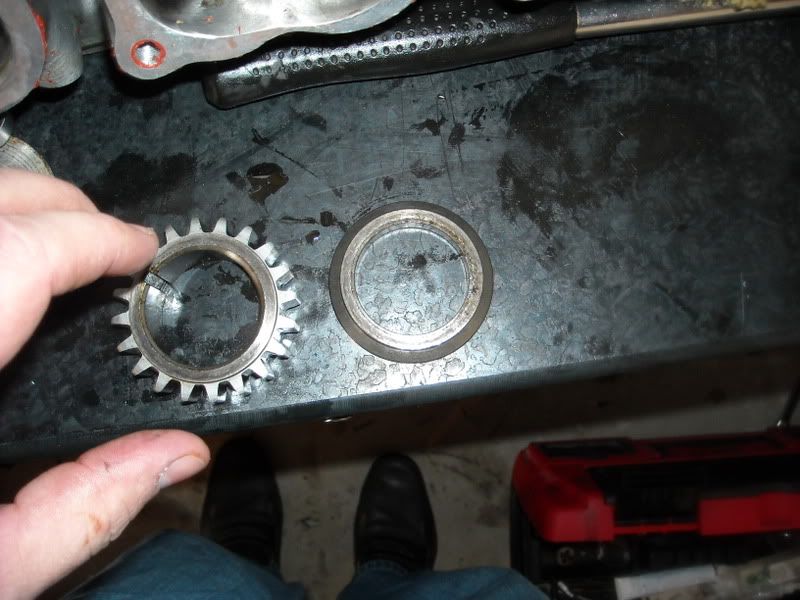
Last edited by LGAFF; 11-02-2008 at 06:31 PM. |
|
|

|
|
|
#137 |
 Join Date: Mar 2007
Location: Crystal Lake, IL
Posts: 7,194
|
Removed the oil pump, strighhforward, three 10mm bolts and it slides off:
Front 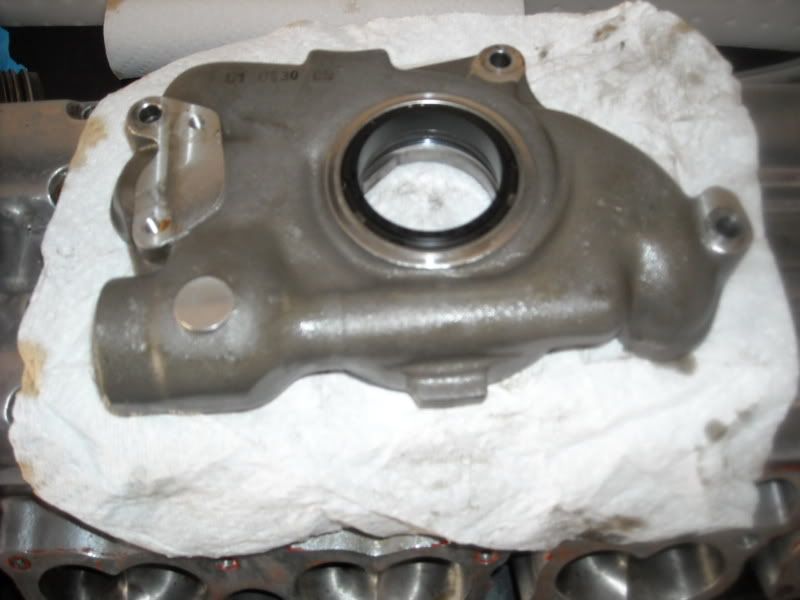 back 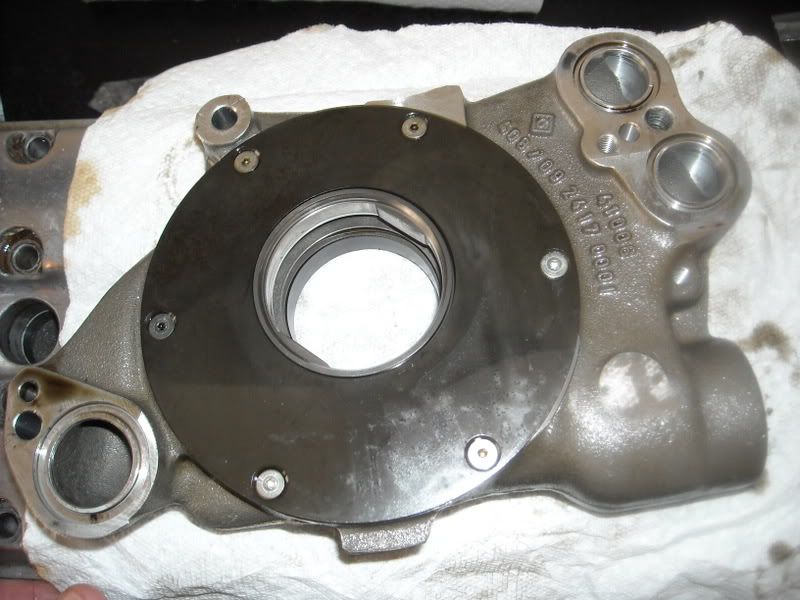
|
|
|

|
|
|
#138 |
 Join Date: Mar 2007
Location: Crystal Lake, IL
Posts: 7,194
|
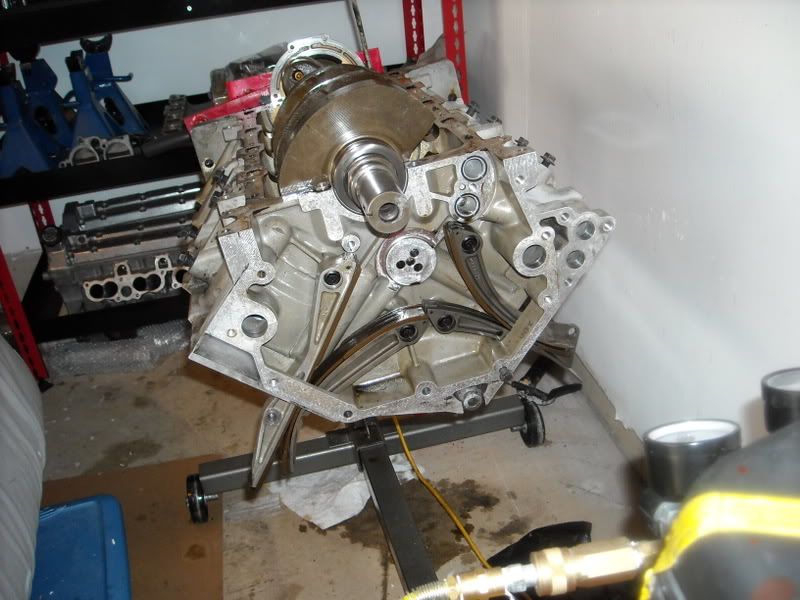
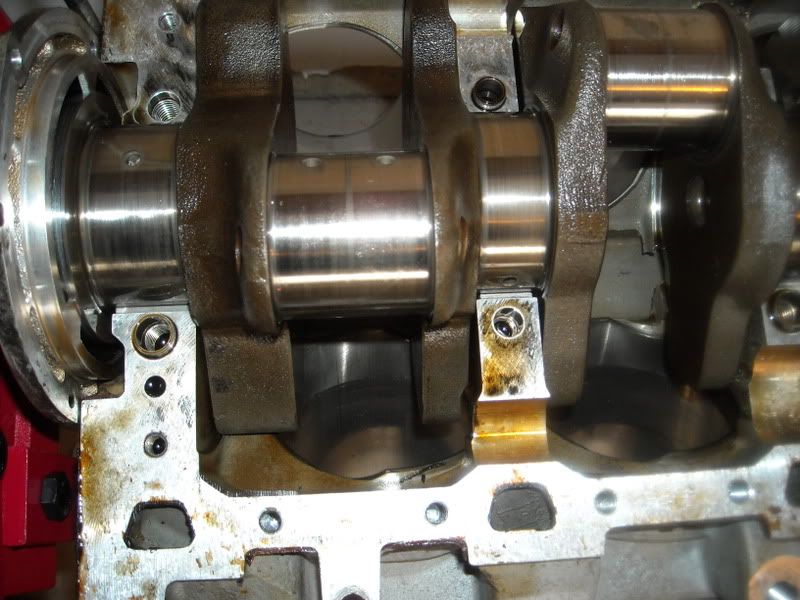
Ok, for the record had this been a stand alone thread I would have used the title "Pulled my crank today: Pics inside!" but anyway here is the deal after unbolting about 25 perimeter bolts here is the girdle:
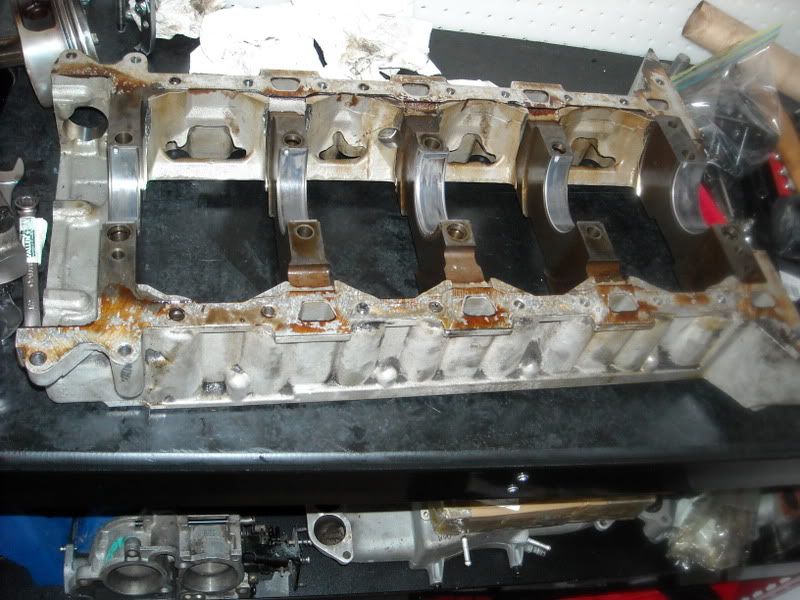   LGAFF 92 ZR1 #234 |
|
|

|
|
|
#139 |
 Join Date: Mar 2007
Location: Crystal Lake, IL
Posts: 7,194
|
Girdle bearing 1(front)
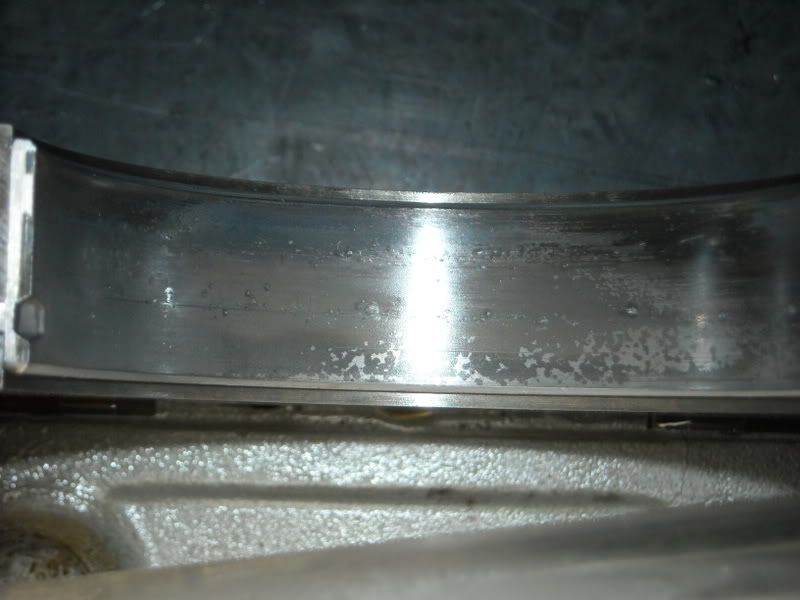 bearing 2: 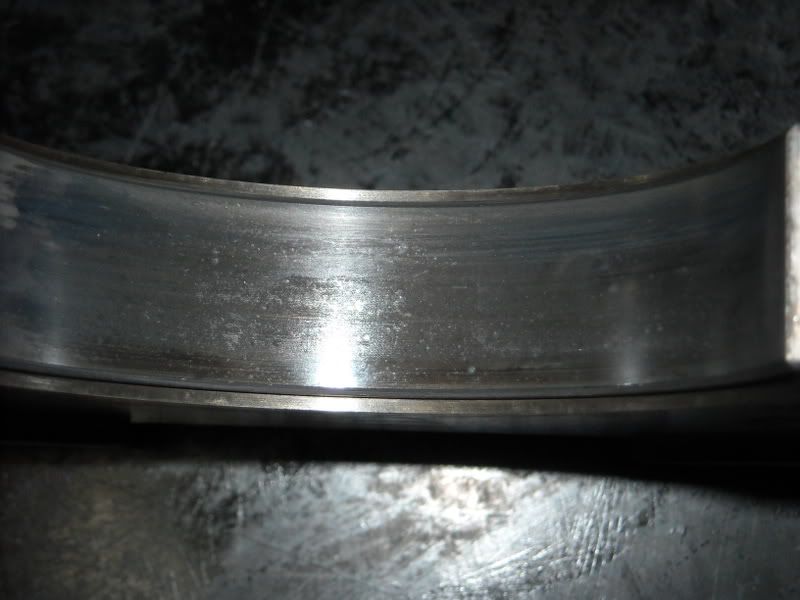 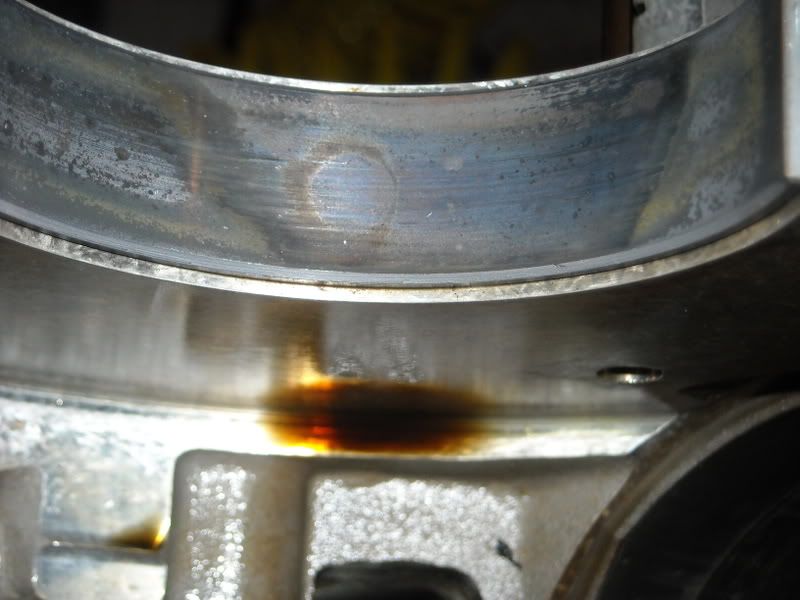
Last edited by LGAFF; 11-02-2008 at 11:34 PM. |
|
|

|
|
|
#140 |
 Join Date: Mar 2007
Location: Crystal Lake, IL
Posts: 7,194
|
Bearing 3/Thrust bearing:
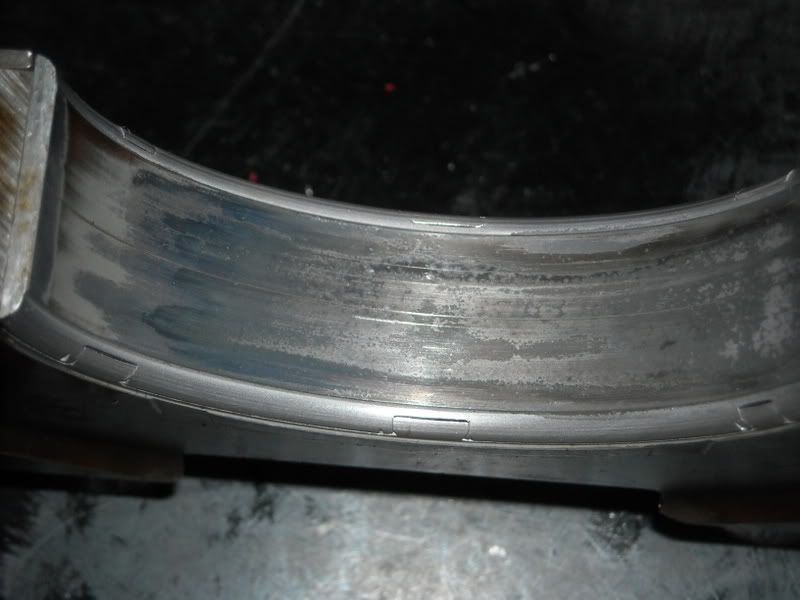 Side shot: 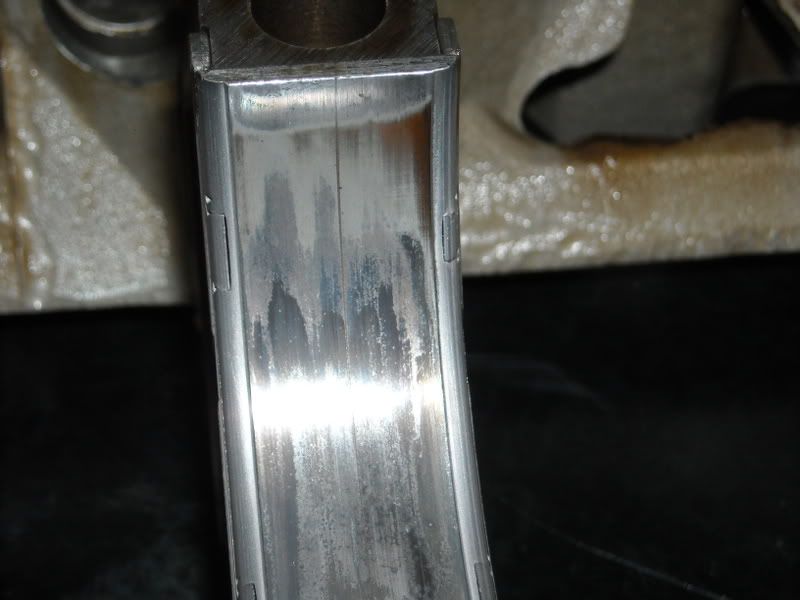 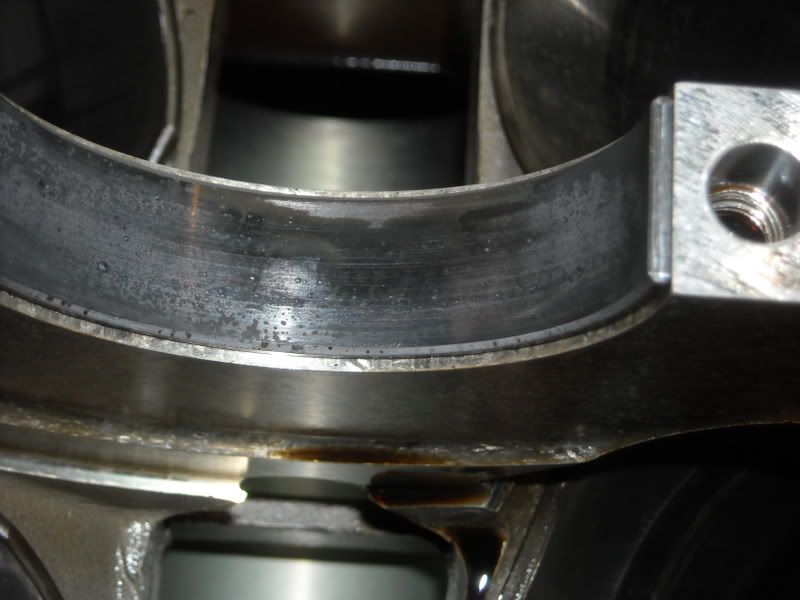 LGAFF 92 ZR1 #234 Last edited by LGAFF; 11-02-2008 at 11:40 PM. |
|
|

|
 |
|
|