|
|
#91 |
|
Join Date: Apr 2009
Location: Prather, CA
Posts: 809
|
Also, because the '91-'93 style sport seat only has a seat control on one side, I had to cut a hole in the other side since the '90 sport seat has two controls, one in each bolster. I just copied the way GM cut the hole.
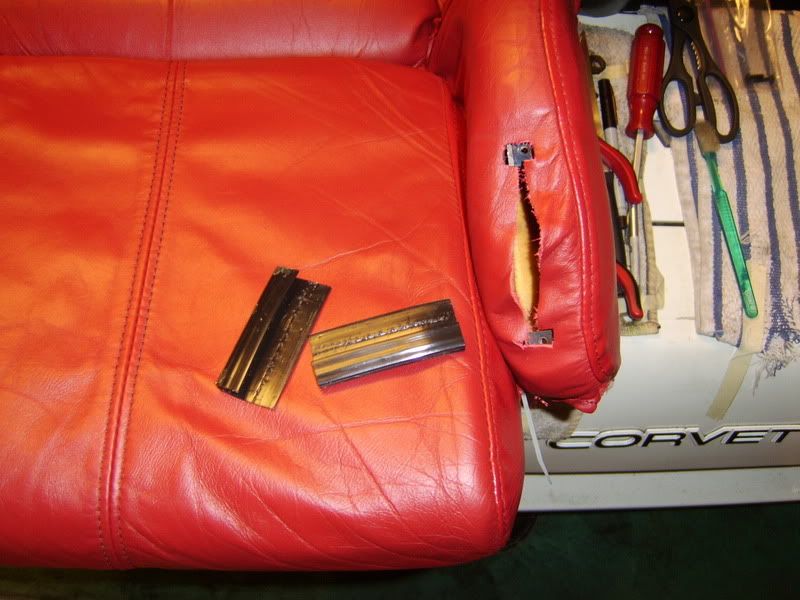 Then I removed the black, plastic holder things from the old seat cover and attached them to the leather with some heavy-duty staples. I had to put in the staples by hand because the staple gun I have wouldn't make the staple go through the plastic. 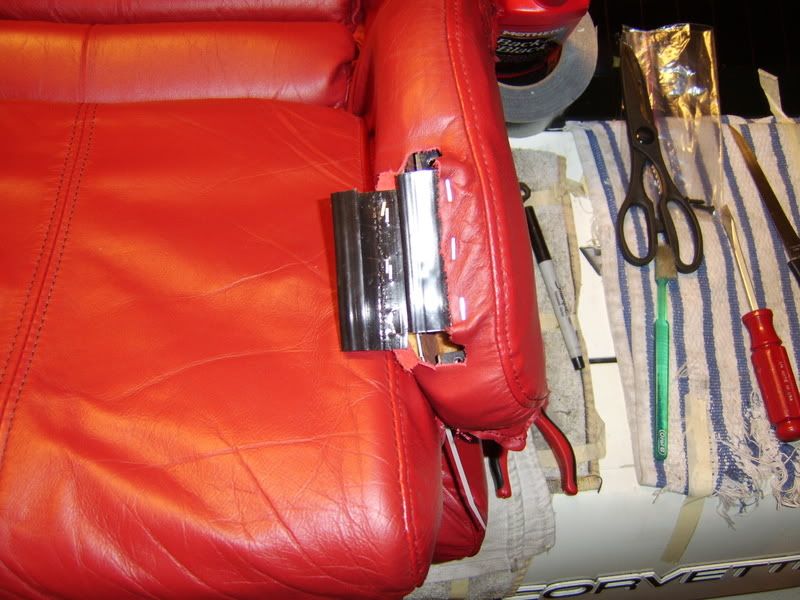 The bladders in the seats were actually still intact except for right at the spot where the tubes plug into them, where they were cracked and disintegrating. I decided to try to repair them with some of "The Right Stuff" RTV. Worked out pretty well and they hold air now. 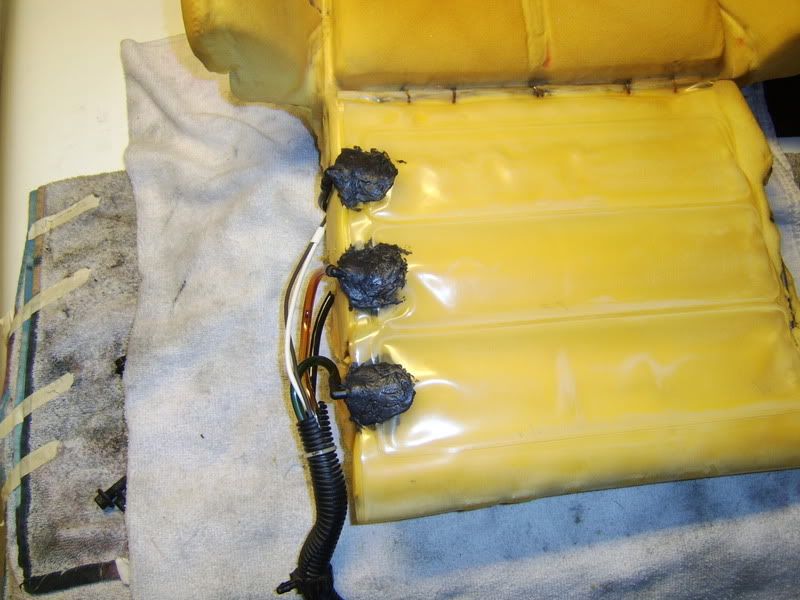 With the driver's side seat bottom and back covers installed, I got to work on the rest of the seat assembly. Removed the old bolster covers and installed the "new" ones. Then cleaned up the plastic seat back, bottom and seat track. 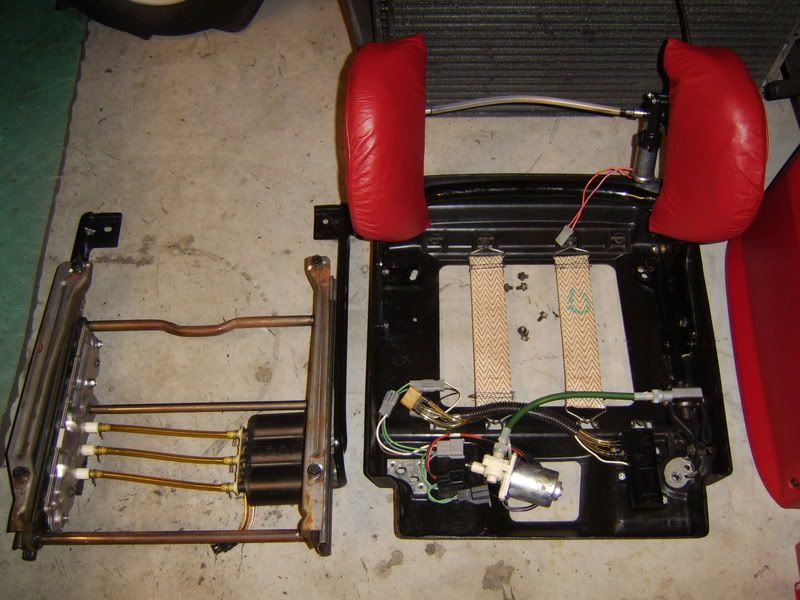 Before I put the seat back together, I temporarily hooked up all the plugs in the seat and hooked a battery to the power supply connector of the seat so I could test all the functions. Surprisingly, all the functions worked, even the air pump. The only thing I had to do was clean and lubricate the power seat recliner at the worm gear assembly, it was a little gummed up and the motor was having a hard time moving the seat back. With that done, I reassembled the seat, then installed the driver's seat track in the car. I found it is better to install the seat track separately from the rest of the seat; it's easier to get to the mounting bolts that way. 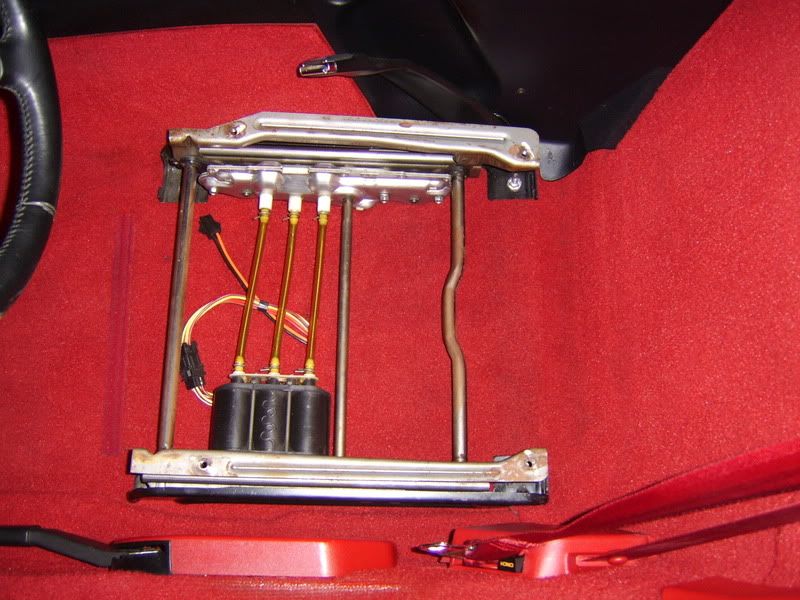 Driver's seat finished and installed in the car. 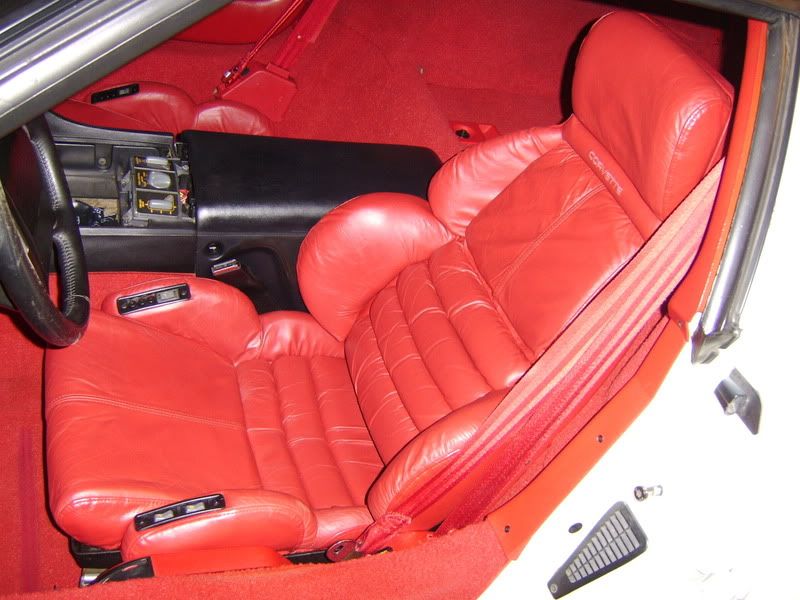
__________________
[IMG]http://i13.photobucket.com/albums/a292/bdw18_123/_zr1netforumsigphoto.jpg[/IMG][B] 1990 Corvette ZR-1 [/B][I] White/Flame Red, #2299, mostly stock, 144K miles.[/I] -Cams timed to the '93-'95 405HP LT5 stock timing. -IAT sensor relocated to below front bumper. -Haibeck hoops installed in airduct. -OBX cat-back exhaust. [COLOR=DarkRed][B](SOLD - December 2012 [/B][/COLOR][COLOR=DarkRed][B]:hello:)[/B][/COLOR] 1993 Corvette Coupe Black/Black, 6-speed (SOLD - October 2009 :hello:) |
|
|

|
|
|
#92 |
|
Join Date: Apr 2009
Location: Prather, CA
Posts: 809
|
A couple days earlier, the steering wheel cover I ordered came in and I decided to switch gears for a bit and work on getting that installed before continuing work on the passenger seat. I got tired of looking at that ugly steering wheel.
This is the cover I installed. 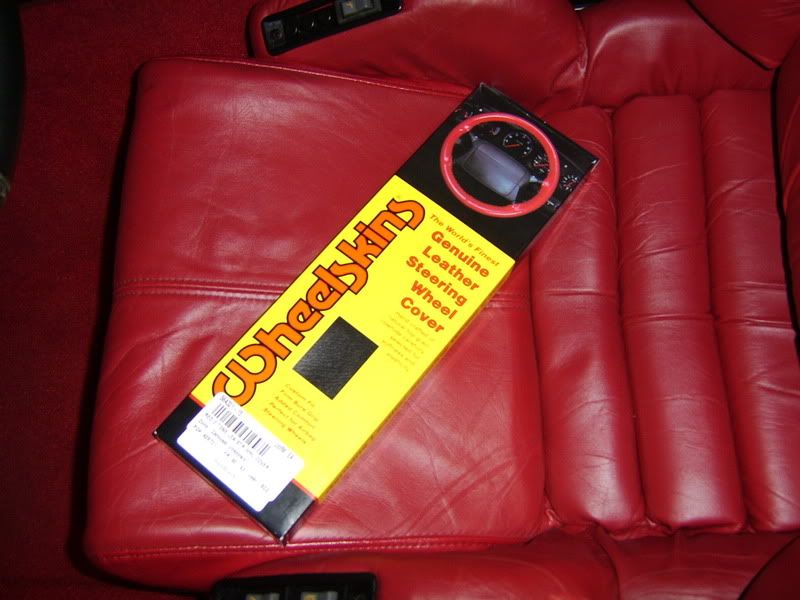 Installing the cover was fairly straight forward, the instructions were pretty easy to follow. Except for the part where it said it would take about an hour to install. Wrong! It took me maybe 3 or 4 hours to finish. This was my first time installing a cover like this though and I was taking my time so that I'd get it right. I was also having fun sitting there and blasting the stereo in the Z with my iPod hooked up which is probably part of why it took that long to install the cover. Some people say the Bose system in these cars suck, but mine sure doesn't. For a 20 year old system, I'm surprised at how good it sounds. You could hear the bass clear into the house and that's with the car's doors closed. The only things I did was install speakers and amps from a '93 stock Bose/Gold system (because my stock ones were all missing except for one of the fronts, but the amp was missing) and do the mod to the speaker cones where you coat them with a couple layers of a mixture of wood glue and water to make the sound crisper. Anyway, back on topic. Here is a before and after of the steering wheel. What a difference! 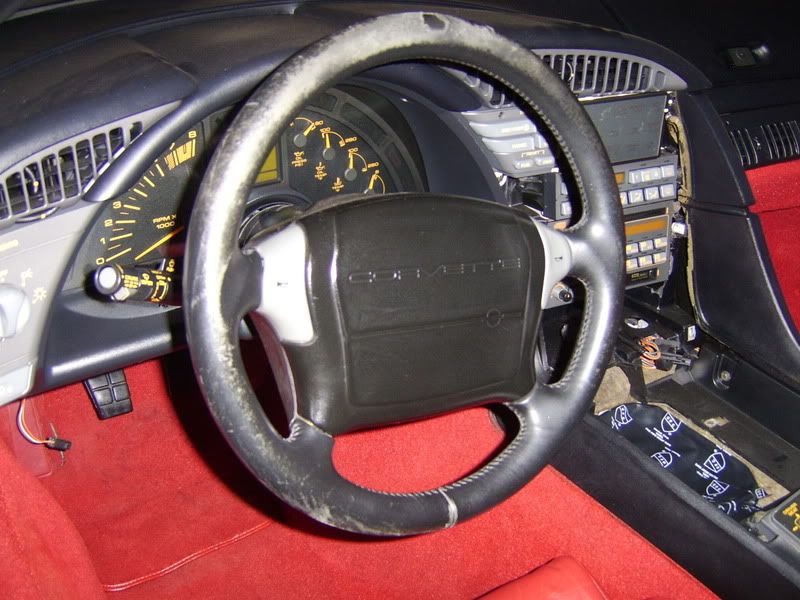 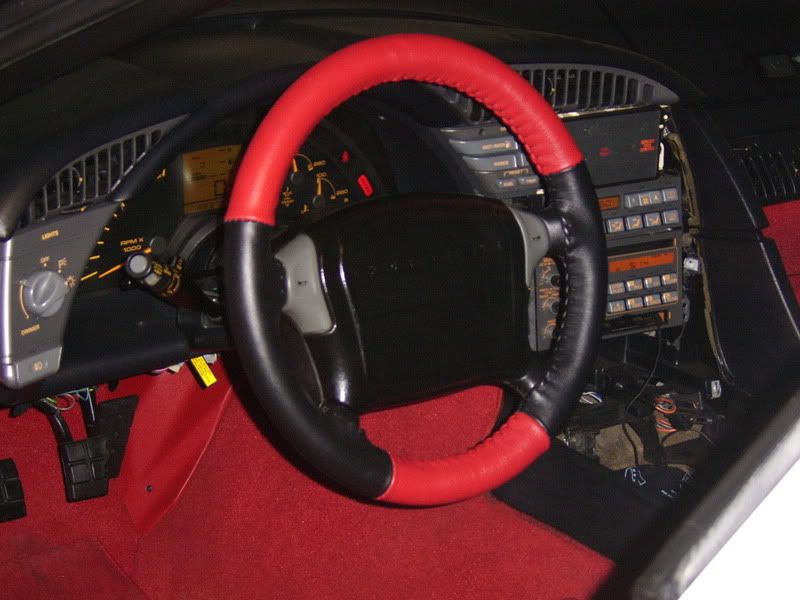
__________________
[IMG]http://i13.photobucket.com/albums/a292/bdw18_123/_zr1netforumsigphoto.jpg[/IMG][B] 1990 Corvette ZR-1 [/B][I] White/Flame Red, #2299, mostly stock, 144K miles.[/I] -Cams timed to the '93-'95 405HP LT5 stock timing. -IAT sensor relocated to below front bumper. -Haibeck hoops installed in airduct. -OBX cat-back exhaust. [COLOR=DarkRed][B](SOLD - December 2012 [/B][/COLOR][COLOR=DarkRed][B]:hello:)[/B][/COLOR] 1993 Corvette Coupe Black/Black, 6-speed (SOLD - October 2009 :hello:) Last edited by bdw18_123; 02-23-2011 at 10:07 PM. |
|
|

|
|
|
#93 |
  Join Date: Feb 2010
Location: Pendleton, IN
Posts: 3,904
|
Looks great!!!!
__________________
1988 KOH Prototype EX5023 sold 1990 ZR-1 #444 Convertible 1990 ZR-1 Black #966 1991 ZR-1 Quazar Blue #296 1957 Duntov SS Project |
|
|

|
|
|
#94 |
 Join Date: Dec 2004
Location: Jacksonville, FL USA
Posts: 4,645
|
 Holy smokes the work you are doing is looking soooo sweeeet! What a restoration! That car is going to be slick! I never would have thought to use zip ties!   Tom
__________________
1990 ZR-1, Black/grey, #2233, stock. ZR-1 Net Reg Founding Member #316 & NCM member |
|
|

|
|
|
#95 |
|
Join Date: Apr 2009
Location: Prather, CA
Posts: 809
|
The interior is done now except for the shifter console which won't go back in until the transmission and engine are back in and the driver's side under-dash panel which I want to leave off for now because I need to troubleshoot why my 3rd brake light doesn't work.
Passenger seat is in.   And now, I can really get to work on the heart of this beast! First thing I did was drop the oil pan. 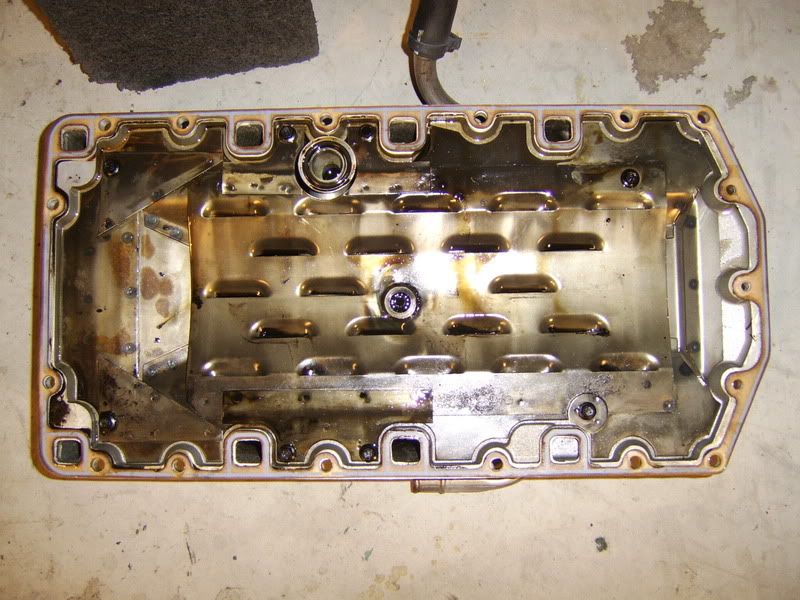 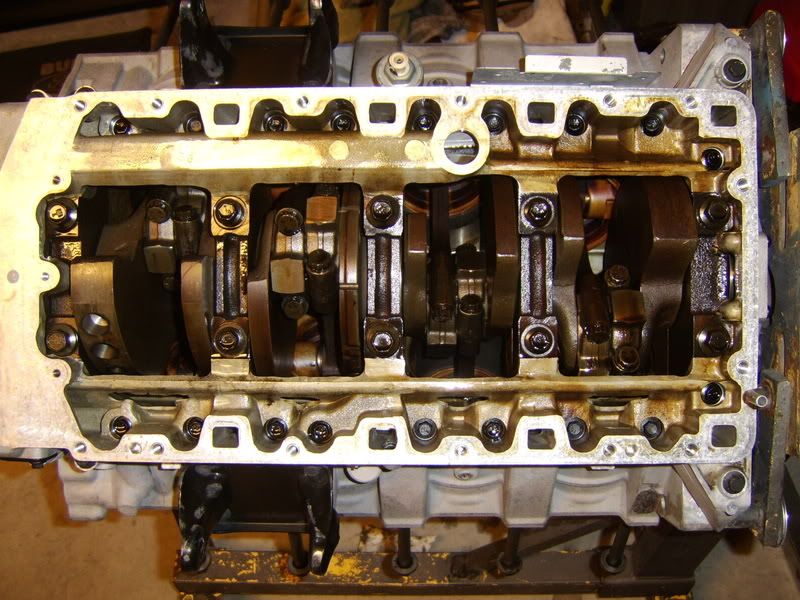 Also finished cleaning the carbon deposits off of all the pistons. First I scraped off the worst of the deposits with a plastic scraper tool. Then I used a 3M "Roloc Bristle Disc" (the plastic/rubber version of a wire cleaning wheel) that I attached to my drill to get the piston nice and clean. I also used a shop-vac periodically during that process to get the removed deposits out. 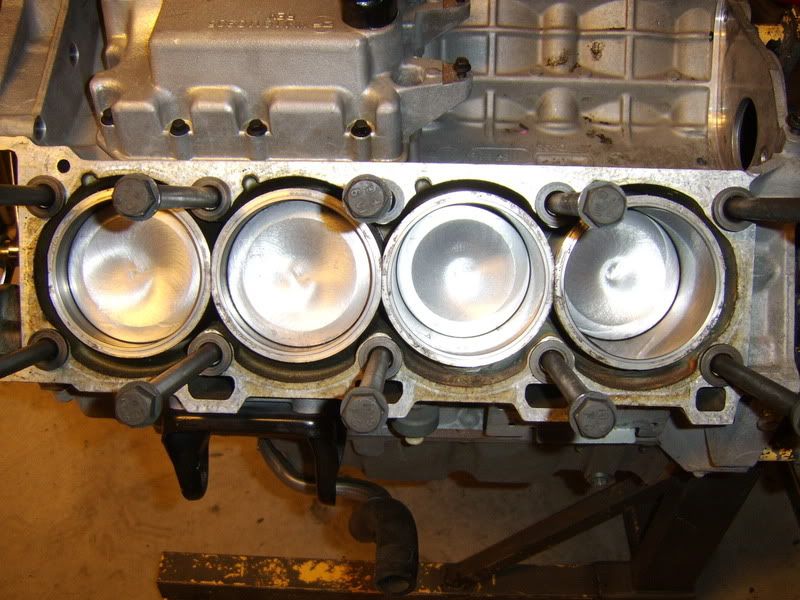 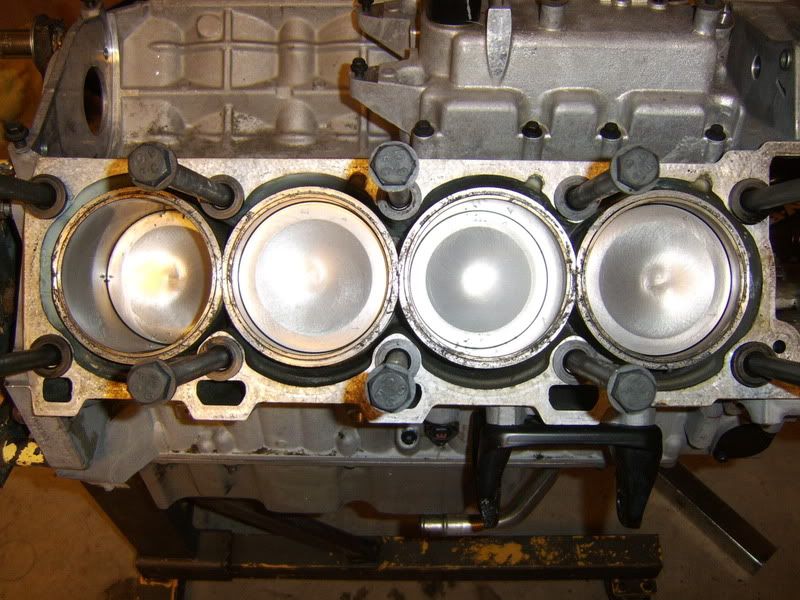
__________________
[IMG]http://i13.photobucket.com/albums/a292/bdw18_123/_zr1netforumsigphoto.jpg[/IMG][B] 1990 Corvette ZR-1 [/B][I] White/Flame Red, #2299, mostly stock, 144K miles.[/I] -Cams timed to the '93-'95 405HP LT5 stock timing. -IAT sensor relocated to below front bumper. -Haibeck hoops installed in airduct. -OBX cat-back exhaust. [COLOR=DarkRed][B](SOLD - December 2012 [/B][/COLOR][COLOR=DarkRed][B]:hello:)[/B][/COLOR] 1993 Corvette Coupe Black/Black, 6-speed (SOLD - October 2009 :hello:) Last edited by bdw18_123; 03-21-2011 at 10:20 PM. |
|
|

|
|
|
#96 |
|
Join Date: Apr 2009
Location: Prather, CA
Posts: 809
|
The next task was to get the one cylinder liner replaced that had some chips in the Nikasil lining. This is the #3 cylinder on the driver's side that looks like it had coolant in it for awhile. The lack of lubricant caused by the coolant is probably how those chips got there as all the other liners are fine. Here is a picture of the driver's side pistons from before I cleaned them.
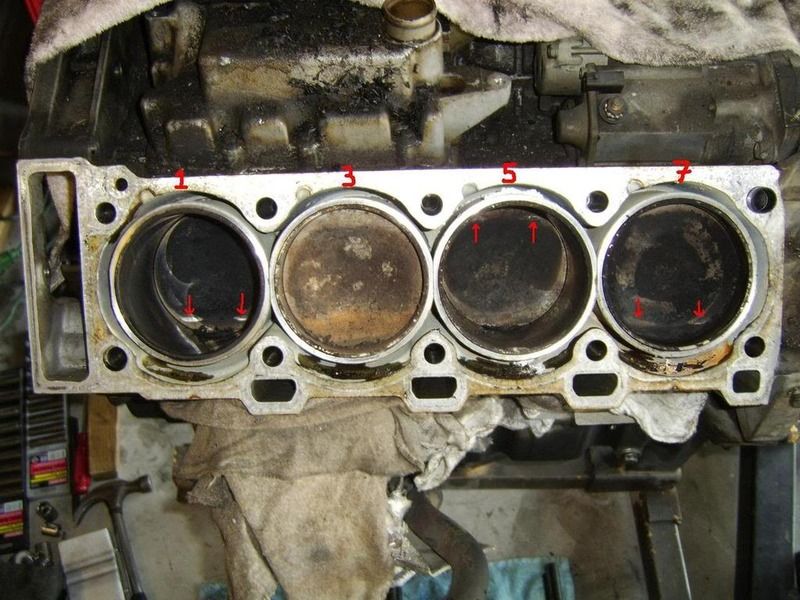 Unbolted the rod cap of the #3 piston and removed the piston. I forgot to take a pic of this piston before I cleaned it, but the sides of it were pretty gummed up with carbon/rust from the coolant sitting on the rings. The rings were stuck to the piston so bad that they came off in lots of pieces.  Once I got the old rings completely off, I cleaned up the piston and the ring grooves with some carb cleaner and a scotch brite pad. I also used a piece of the broken rings initially, to help clean the worst of the crud out of the ring grooves. Then I got to wondering where I was going to find some stock rings and of course, thought of Jerry first thing. He does have some NOS original LT5 rings for $75 per piston, but I'm on a really tight budget right now so I contacted him and asked if he had any good condition, used rings laying around that he could sell me. Turns out, he did have some and gave me two sets of rings for free! www.jerrysgaskets.com will always be the first place I go when I need LT5 gaskets and parts for sure! Highly recommended! Of course, most of you here already know that. Once I got the replacement used rings in the mail, I installed them on the piston very carefully with just my hands. It actually wasn't that hard, you just have to be careful to only spread the ring apart the bare minimum needed to get it installed and to twist it as little as possible. Before I installed them, I did check the end gap of the rings and they are all within spec. I also made sure the ring gaps were positioned correctly as well.  The rod bearings and crankshaft surface actually look very nice for having 140K on them. Looks like the one thing the previous owner did do right was getting the oil changed frequently enough.   Then I got to work removing the old cylinder liner. Since I don't have the special cylinder liner removal tool and because the liner was toast anyway, I decided to try removing it with two large vise grips. Just as a warning, removing a liner this way WILL damage the Nikasil coating, so only do it if the liner you are removing is already damaged. I clamped one vise grip onto the edge of the liner and clamped the other one onto the handle of the first one, at a 90 degree angle to it. I then used a hammer to carefully hit the handle of the second vise grip to get the liner out. After 10-15 or so whacks with the hammer, the liner came out. 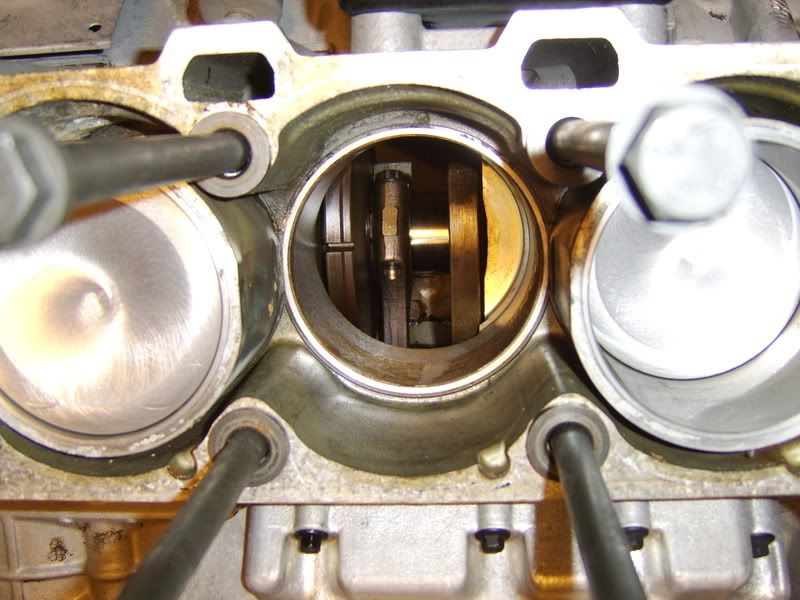
__________________
[IMG]http://i13.photobucket.com/albums/a292/bdw18_123/_zr1netforumsigphoto.jpg[/IMG][B] 1990 Corvette ZR-1 [/B][I] White/Flame Red, #2299, mostly stock, 144K miles.[/I] -Cams timed to the '93-'95 405HP LT5 stock timing. -IAT sensor relocated to below front bumper. -Haibeck hoops installed in airduct. -OBX cat-back exhaust. [COLOR=DarkRed][B](SOLD - December 2012 [/B][/COLOR][COLOR=DarkRed][B]:hello:)[/B][/COLOR] 1993 Corvette Coupe Black/Black, 6-speed (SOLD - October 2009 :hello:) Last edited by bdw18_123; 03-21-2011 at 10:31 PM. |
|
|

|
|
|
#97 |
|
Join Date: Apr 2009
Location: Prather, CA
Posts: 809
|
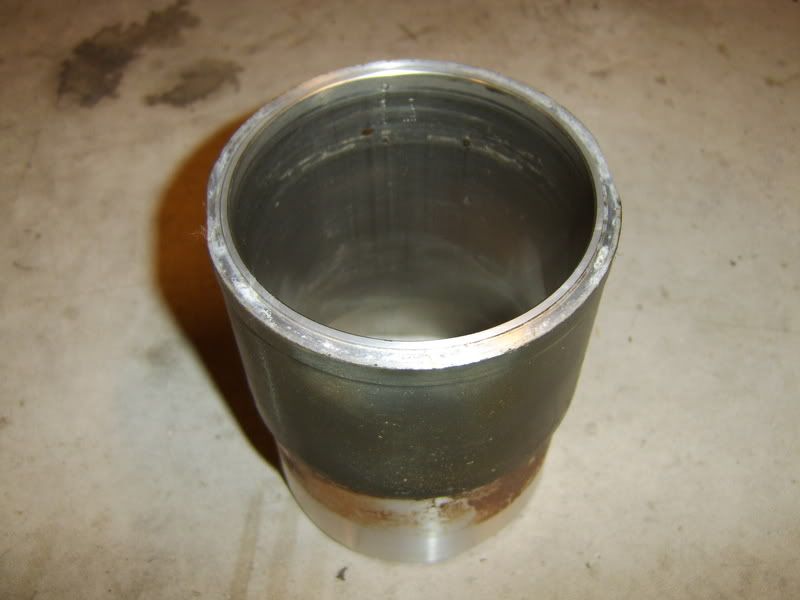 With the liner out, I cleaned all the old glue off of the block. The replacement liner I have is one I got from Jerry awhile back. It is used, but it looks more new than used. Per the service manual, I checked the "step" area on the outside of the liner for burrs and glue remains. This is very important to do because the height of the liner relative to the block and relative to the other liners is very critical. It must be within .001-.003 thousandths of an inch. There was a few areas that needed attention, so I cleaned off all the old glue and carefully filed down any tiny imperfections/burrs. With both the liner and the area on the block where the liner seats clean, I applied the Loctite 565 sealer to the liner in the amount specified by the service manual. Then I carefully slid the liner into place. I don't have the special temporary liner hold downs so I came up with my own using 4 large sockets on the original head bolts. I only tightened them just enough to hold the liner in place until I am ready to install the heads.  The piston is now ready to be reinstalled. Being that I also don't have a ring compressor, I made my own using two good sized hose clamps and a piece of sheet aluminum. I oiled up the liner, piston and my home-made ring compressor with some special piston/ring/cylinder oil meant specifically to be used in the piston/ring/cylinder area, it's designed to burn clean. I also made sure the arrow on the top of the piston pointed towards the front of the engine.  Piston #3 is now reinstalled and ready to go. 
__________________
[IMG]http://i13.photobucket.com/albums/a292/bdw18_123/_zr1netforumsigphoto.jpg[/IMG][B] 1990 Corvette ZR-1 [/B][I] White/Flame Red, #2299, mostly stock, 144K miles.[/I] -Cams timed to the '93-'95 405HP LT5 stock timing. -IAT sensor relocated to below front bumper. -Haibeck hoops installed in airduct. -OBX cat-back exhaust. [COLOR=DarkRed][B](SOLD - December 2012 [/B][/COLOR][COLOR=DarkRed][B]:hello:)[/B][/COLOR] 1993 Corvette Coupe Black/Black, 6-speed (SOLD - October 2009 :hello:) Last edited by bdw18_123; 03-21-2011 at 10:47 PM. |
|
|

|
|
|
#98 |
 Join Date: Dec 2003
Location: Arcadia,OK
Posts: 3,394
|
Ben, you,ve done an excellent job and been very innovative with your work-around special tools. Piston tops look outstanding.
Good luck with the rest of the job.
__________________
Jerry Downey JERRYS LT5 GASKETS & PARTS http://www.jerrysgaskets.com 1994 ZR-1, Black/Black, Lingenfelter Aerobody, 416cu in, 3.91 gears, coil-over susp, Brembo brakes, etc. 2016 Black-Red, 3LT-Z51 Auto 8-speed. |
|
|

|
|
|
#99 |
|
Join Date: Mar 2009
Location: Orlando, FL
Posts: 1,828
|
Looking great! Thanks for the pics!
|
|
|

|
|
|
#100 |
 Join Date: Jul 2004
Location: Sudbury, Ontario. Canada
Posts: 1,538
|
If you have access to a machine shop you can get the inside of the old liner taper machined to make yourself an excellent ring compressor. We did that back when I was racing Jag V12s - worked well.
Great job you're doing on the rebuild here!
__________________
1991 #1516 Black/Black davidmkelly.com "Speed is often confused with insight." - Johan Cruijff |
|
|

|
 |
|
|