|
|
#1 |
 Join Date: Jul 2015
Location: Indianapolis
Posts: 162
|
Forgive the Xbox reference, but It's been a good weekend for me.
First off, extra special thanks to Dave Hetrick and Jim Voter for coming to my rescue at one point. (Explanation to follow). I am writing this post not to toot my own horn, but because I want to tell the story and I figure all of you are the only ones on earth who give a sh*t. lol Plus I am not mechanically inclined so I thought the story of my first plenum pull (by myself even) might be useful for someone in the future. Backstory: A few weeks ago during my local corvette club even of taking a lap around the Indianapolis Motor Speedway before the Indy500 my ZR-1 developed a bit of a shake and knocking sound at low RPMS. After a talk with Dave Hetrick, and Marc Haibeck it was determined that the knock was the Flywheel adjusting for a misfire as it happened only when the car was warmed up at idle and at 30mph in 4th gear the car stuttered when gas was applied. (A Haibeck reccomended test). My car is a 1990 with 30405 miles on it. Original Injectors were finally bad. I had been living on borrowed time, it was time to put up or pay someone who would. I don't have many free weekends, I'm a full time freelance photographer so I wasn't sure when it was going to happen or if I would just take the car to Marc Haibeck to have the repair done. I had all the parts bought last year knowing this would happen eventually, but I'd never done such extensive a repair on an engine like this much less a LT5. I started memorizing Marc Haibeck's plenum pull video and reading every resource I could on the subject. Wednesday or Thursday last week I decided Saturday (6/10) was the day. I was going to get up early and get in the garage before it got super hot. I didn't have time to get as many parts as I wanted to refresh under the plenum but I got a few rubber pieces that are known for being brittle. Thanks Jerry from Jerry's Gaskets for making sure he's got a lot of those little hard to find numbers. Saturday rolled around and I woke up to raccoons I needed to relocated trapped the night before. Instead of getting started at 8, it looks like I was getting started at 10 and I had a helluva time even getting the coolant cap off. I'll be honest, I was wondering if I was making a mistake and I hadn't even gotten started. 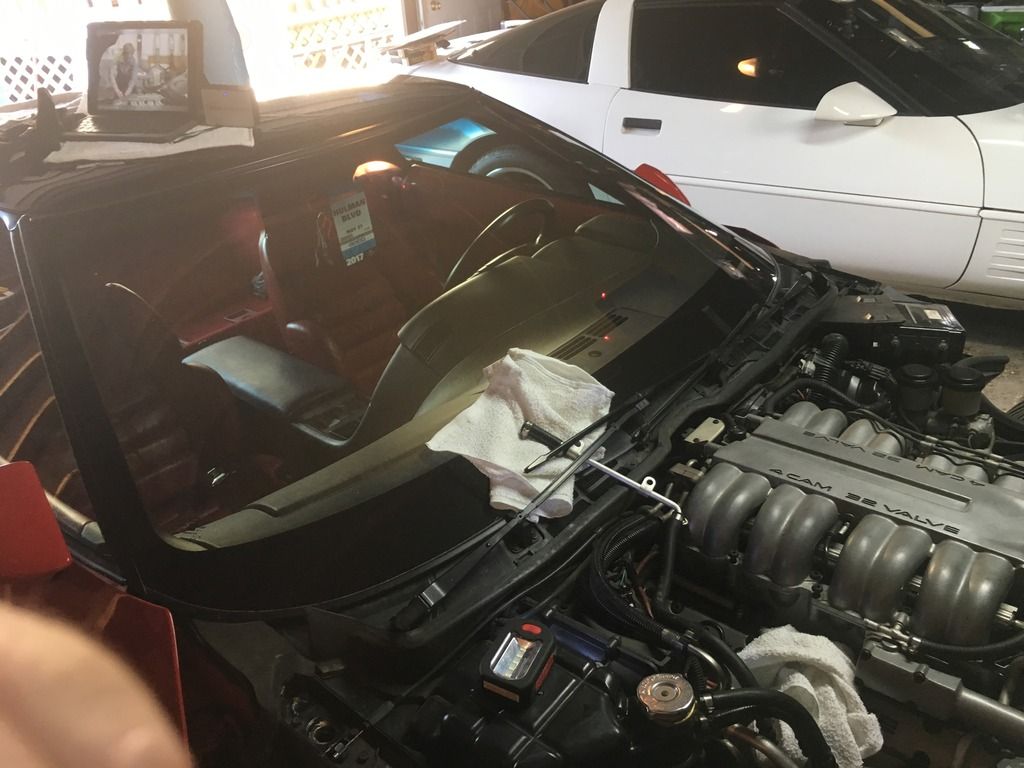 With Haibecks video loaded onto my iPad the work began. Working very slowly and diligently to not break any of the little unobtainable plastic pieces. Slowly but surely Marc's video guided me through the procedure. I took my time, was very deliberate. Tightened any loose screw I found and only cleaned lightly as to not want to break anything. 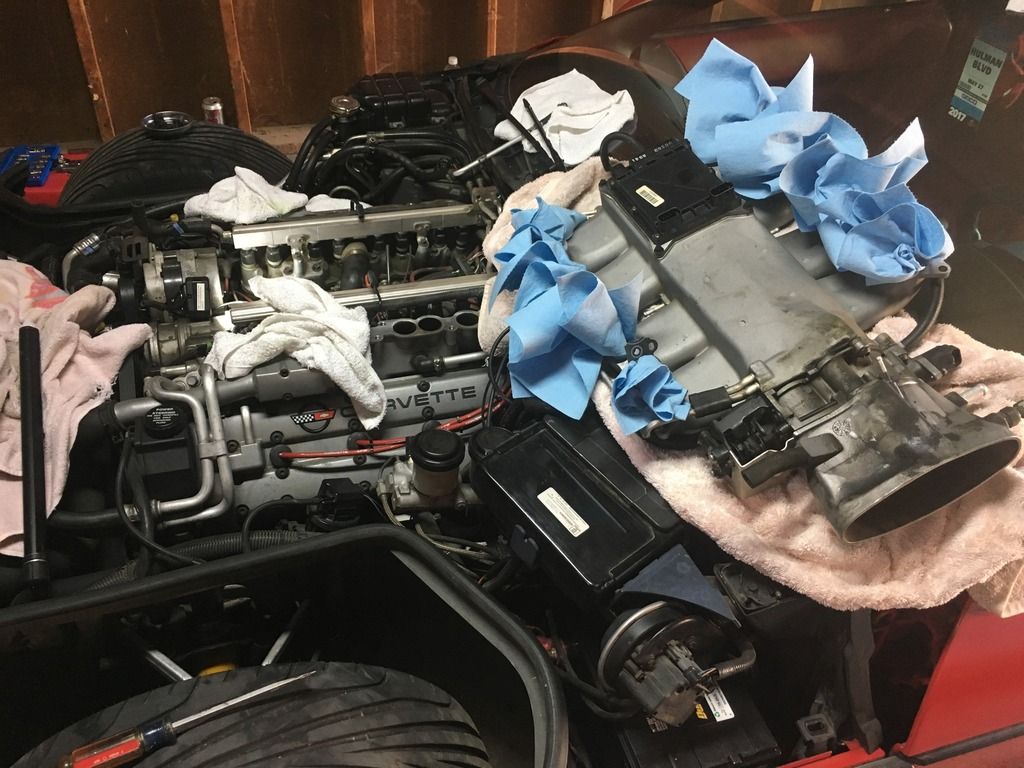 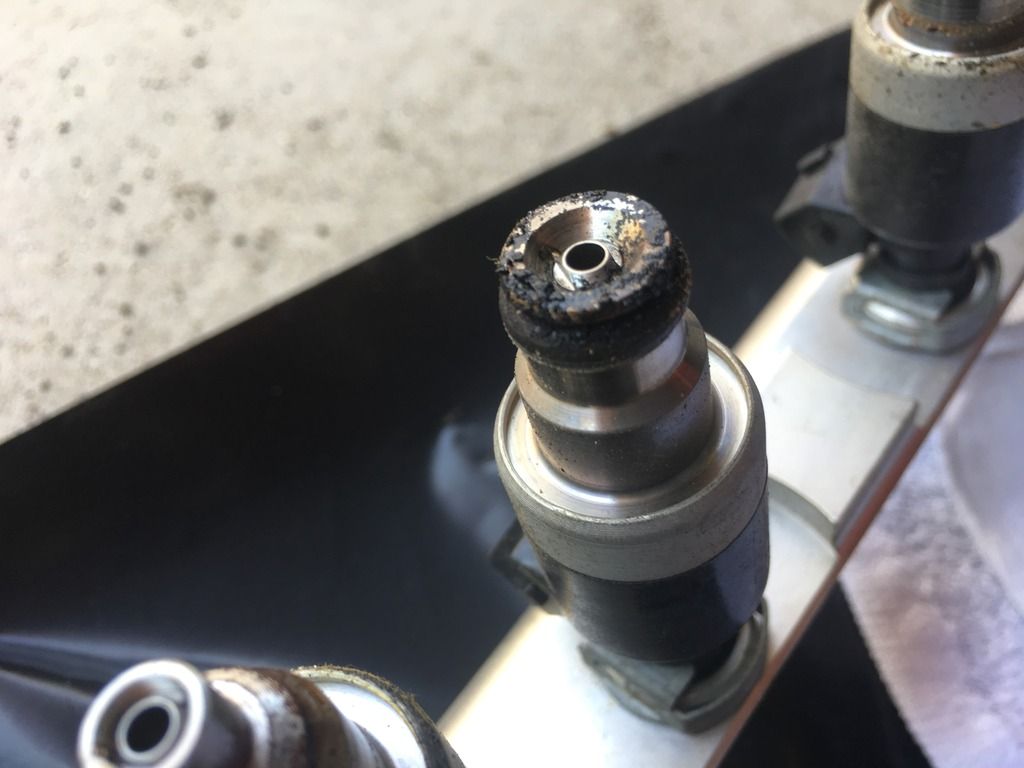 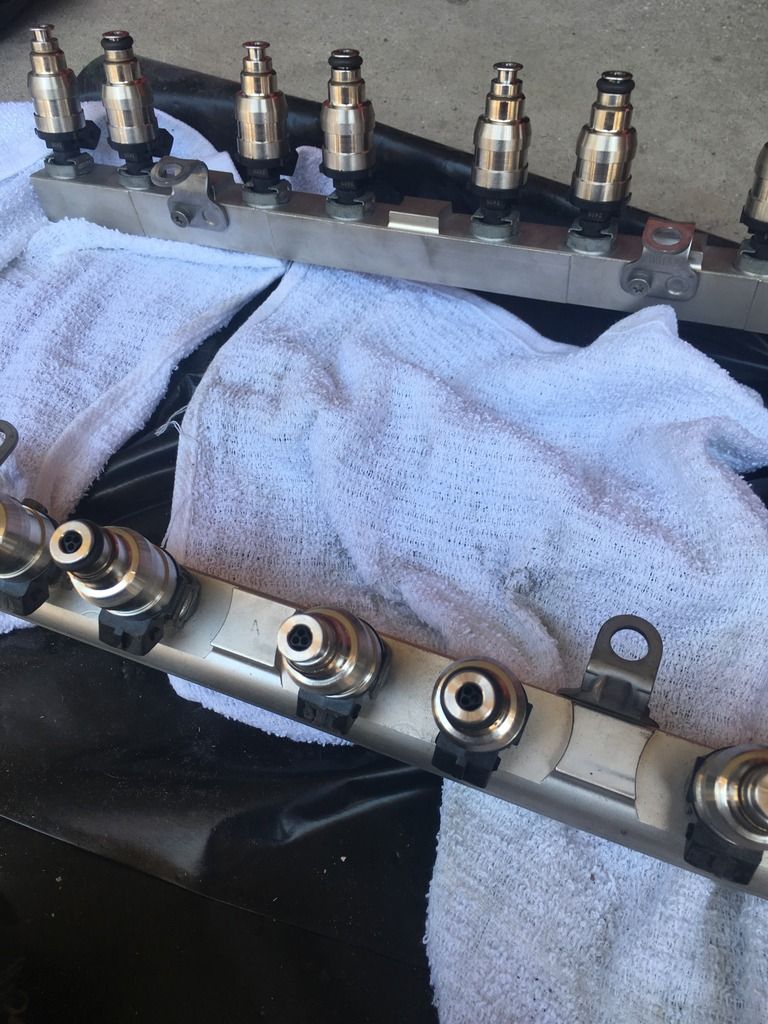 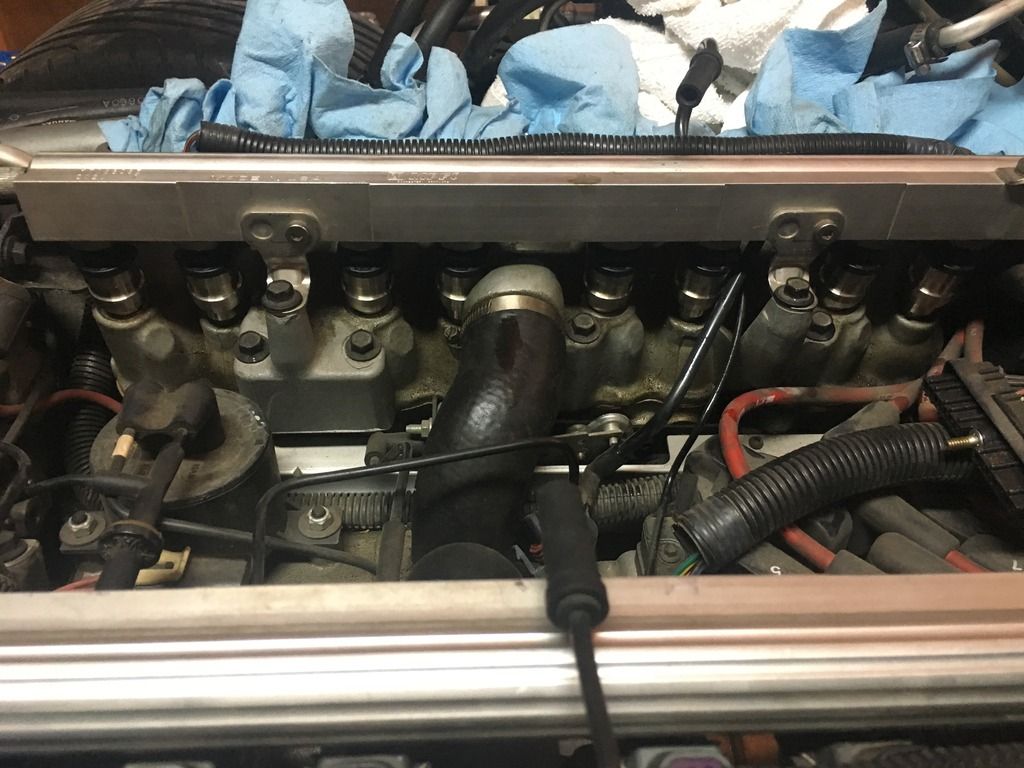 About 10 hours and only a few hickups later, the engine was reassembled and I was practically doing back flips in the front yard afters he started for the first time. I was sort of hoping to do this in less time than it took me to do the Oil Cooler lines (which took me almost 7 hours due to the hoses being about 1/2 too long), but again I'm not mechanically inclined. This was a big deal for me. Today I drove the car and checked for leaks and the thing drives amazing. Another issue I had on this car is that it would hesitate to accelerate hard below 3500RPMS. I always assumed it was a vacuum issue that would only be solved when enough pressure was achieved. After checking the vacuum connections and condition of the rubber pieces while replacing the injectors this problem is no more. There are no leaks. There is no knock or misfire. 10 hours well spent if you ask me. Can put the money I saved from having someone else do it into the jar for a Haibeck 510 package. Few things I learned to pass on to first time plenum pullers. 1. I am not mechanically inclined. I am good at following directions and problem solving, but without help of some way I'd never have been able to do this. Take your time, follow directions and plan for plenty of time. There are instructions in a certain order for a reason. 2. Be prepared to be surprised or frustrated. When I got the fuel injectors out of the car I become concerned because the primaries and secondaries looked different from each other. This lead me to research the accel injectors again mid repair to make sure I wasn't making a mistake. (lead into #3) 3. Research all the parts you intend to replace thoroughly ahead of time. I put Accel injectors in my car and I knew I had to shave a plastic tab off of them but when I looked up the different stock primary/secondary injectors I read a thread about needing a special gasket on the accels to make them work. This was NOT the case and only one thread suggested this, but in the end I only had to remove a gasket from the primaries meaning my preparation was correct. Definitely was freaking out for a minute though and it meant I spent time researching this during the repair. 4. Be patient, and don't be afraid to walk away for a few minutes if you are stuck. At one point towards the end I was getting frustrated because I couldn't get a bolt to tighten. Turns out in order to tighten a bolt you need to turn it the correct direction. 10 minute break and a glass of water, and I was back on track. 5. Don't be afraid to ask for help. The folks on the forum (all of you) are amazing and when I had a question about the Coolant procedure at the end Dave Hetrick (mgbrv8) called Jim Voter (QB93Z) for me to clarify some things while I was still re-assembling the car. Dave and Jim, you saved my Bacon. I thank you. 6. Dremel tool on accel injectors is infinitely better than a standard file. Started using the standard file, but after about ten minutes went out to get grinding bits for the dremel. Finished the other injectors in no time. (like less than a minute each) 7. You're going to spill things. It happens. 8. There are ZR-1 folks all over the world, even if nobody is available to come help in person it IS possible for you to do it on your own if you are slow and deliberate. I am the proof. Thanks everyone for being such an awesome resource, and if you've made it this far thank you for reading about my first Plenum Pull. It's not as scary now for the next time, but I still don't have plans to do it again anytime soon. 
__________________
--Marc 1990 ZR-1 #2530 Gone but not forgotten: 1988 Z52 4+3 1992 LT1 6 speed |
|
|

|
|
|
#2 |
 Join Date: Jul 2009
Location: Texas
Posts: 793
|
You have completed the LT5 right of passage well done Buddy
This explains it https://www.youtube.com/watch?v=j7S0uAph_fo Dave Last edited by mgbrv8; 06-11-2017 at 03:33 PM. |
|
|

|
|
|
#3 |
 Join Date: Nov 2007
Location: Sykesville, MD
Posts: 377
|
Scott
__________________
WAZOO Member '95 Callaway SNAT 450 Aerobody Coupe - Black/Black '92 Callaway SNAT 400 Convertible - Polo Green/Beige '91 ZR-1 #1231 - Arctic White/Saddle (SOLD) '90 ZR-1 #2547 - Turquoise Metallic/Black '89 Callaway Twin Turbo Aerobody Coupe #027 - Black/Black '85 Corvette 454 Coupe - White/Red |
|
|

|
|
|
#4 |
 Join Date: Apr 2015
Location: Kentucky
Posts: 363
|
Marc - Seeing pics of the plenum apart, but none back together. We're not believing a thing you say until we see the reassembled pics!
...just kidding, nice work & write-up!
__________________
'94 ZR1 LT5 - Dark Red Metallic '79 L82 4-speeds of fun '96 LT1 Borla, H-pipe, TB, CAI (Sold) "An adventure is only an inconvenience rightly considered. An inconvenience is only an adventure wrongly considered." -- G.K. Chesterton |
|
|

|
|
|
#5 |
 Join Date: Mar 2014
Location: Warrington PA
Posts: 1,914
|
Congrats, job well done!!! And you got some of the most knowledgeable people to give you advice and help you through. Glad it is running beyond your expectations...

__________________
Tom 1994 ZR-1 #009 "captured test fleet car" 1974 LS4 454 Vert 1974 L-82 355 Vert. 1982 L83 CFI...now a retired "dd"....Sold WAZOO Member Last edited by Roadster; 06-11-2017 at 08:57 PM. |
|
|

|
|
|
#6 | |
 Join Date: Jul 2015
Location: Indianapolis
Posts: 162
|
Quote:
How about the goofy video I sent Dave Hetrick when I first started it? https://www.dropbox.com/s/3d4fnss13a...%20PM.mov?dl=0 Thanks for the feedback everyone, this truly is the best group of enthusiasts around.
__________________
--Marc 1990 ZR-1 #2530 Gone but not forgotten: 1988 Z52 4+3 1992 LT1 6 speed |
|
|
|

|
|
|
#7 | |
 Join Date: Jul 2009
Location: Texas
Posts: 793
|
Quote:
Aww you cut out my favorite part. 🙂 Dave Hetrick 
|
|
|
|

|
|
|
#8 | |
 Join Date: Mar 2014
Location: Warrington PA
Posts: 1,914
|
Quote:
No excuses....lol post pics of the completed job.... 
__________________
Tom 1994 ZR-1 #009 "captured test fleet car" 1974 LS4 454 Vert 1974 L-82 355 Vert. 1982 L83 CFI...now a retired "dd"....Sold WAZOO Member |
|
|
|

|
|
|
#9 |
|
Join Date: Dec 2007
Location: Fremont,Ca
Posts: 3,079
|
Great job,you just saved yourself at least $1,000 on labor not to mention what might have been screwed up by someone else. You forgot one thing,take a lot of pictures. Besides having the DVD I also took plenty of pictures,in some of my plenum pictures you can see them spread out along the base of the windshield.
|
|
|

|
|
|
#10 | |
 Join Date: Jul 2015
Location: Indianapolis
Posts: 162
|
Quote:
I did take a number of photos, but not for a step by step instructional on how to do it. Mostly just to prove to myself I actually did it. lol I put my bolts into a piece of cardboard to signify their homes on the engine. Kept assembly's together etc. Worked well for me. Thanks for the kind words everyone! Excited to get back home to drive her later this week!
__________________
--Marc 1990 ZR-1 #2530 Gone but not forgotten: 1988 Z52 4+3 1992 LT1 6 speed |
|
|
|

|
 |
| Thread Tools | |
| Display Modes | |
|
|