
|
|
|
 07-18-2010
|
#1 |
 Join Date: May 2010
Location: Japan
Posts: 3,095
|
As most of you know I am rebuilding my motor and discovered I had a broken motor mount when I pulled the LT5. I bought new motor mounts (OEM) and could not find the shield or material that covers the motor mounts to protect against heat.
So I had to improvise and make my own so sharing what I did for those that are interested.  The orginal material was trashed so I found this Helix 12" X 40" sheet for under $20 and decided to use it. I think the better material might be from DEI or Cool It (Thermo-Tec) brand of kevlar backing but too expensive for me and this appears to be what the orginal material was. 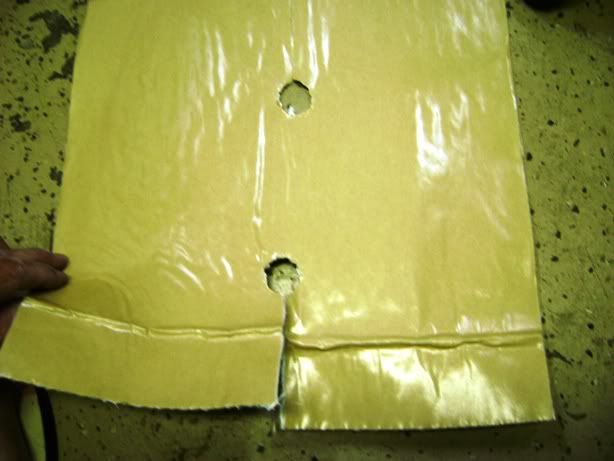 The first step was to make a pattern of the material. The original piece is a little larger than 12" and has folded edges but what I bought will do for my purpose. So I cut a 12" X 12" piece. 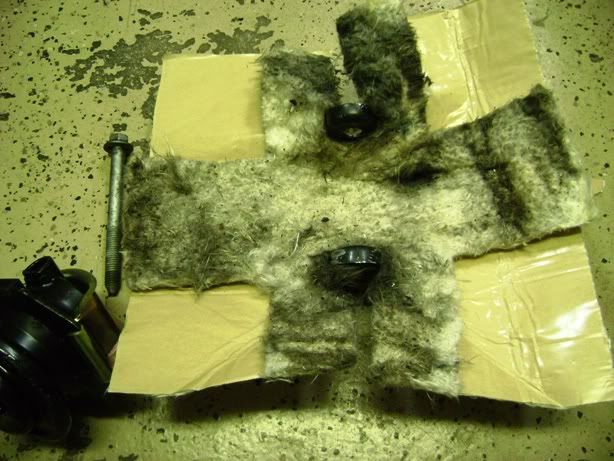 The next step is to transfer the thick fiberglass type of cloth from the OEM cover and I trimmed to fit. 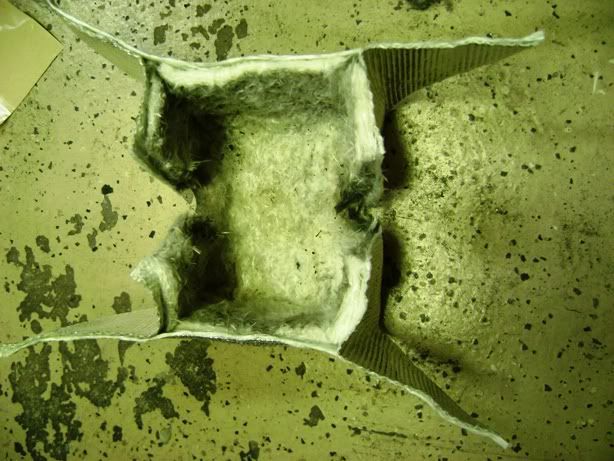 The material I used had adhesive which I did not initially like, but it worked out best to me. I removed the backing for the adhesive and folded the corners together first. Then I made the fiberglass cloth as small as possible and placed in the center and secured to the shape matching the bolt holes for the mount, etc. 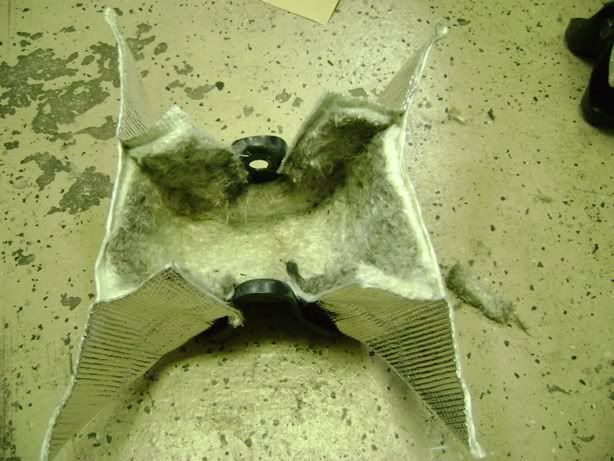 First I wiped the motor mount bracket clean with mineral spirits and disposable towels and placed the shield into the bracket as shown. 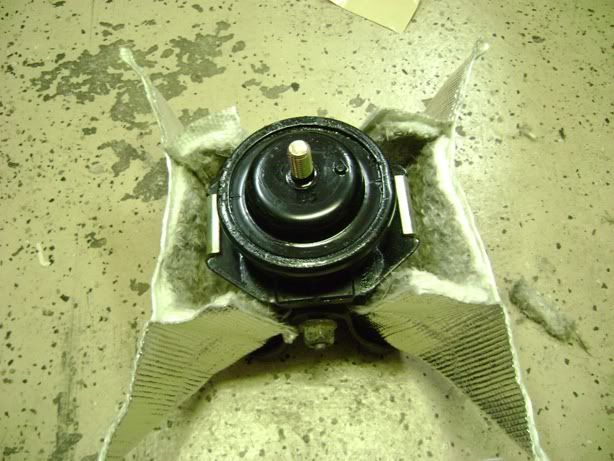 The motor mount is placed into the bracket and hand tight bolted in.
__________________
Craig "ZR-1 NO KA 'OI" "ZR-1 ICHIBAN" 1995 #228 Black/Black with Dunn Heads ZR-1 owner since September 2003 ZR-1 Net Registry Founding Member #0074 NCM Lifetime Member #2048 
Last edited by HAWAIIZR-1; 07-18-2010 at 05:08 AM. |

|

|
|
07-18-2010
|
#2 |
|
Join Date: May 2010
Location: Japan
Posts: 3,095
|
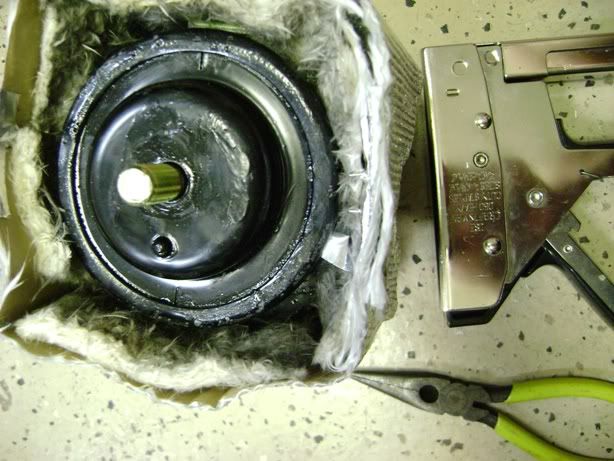 After making the folds I want to form the shield I used my Craftsman staple gun with 1/2" staples. 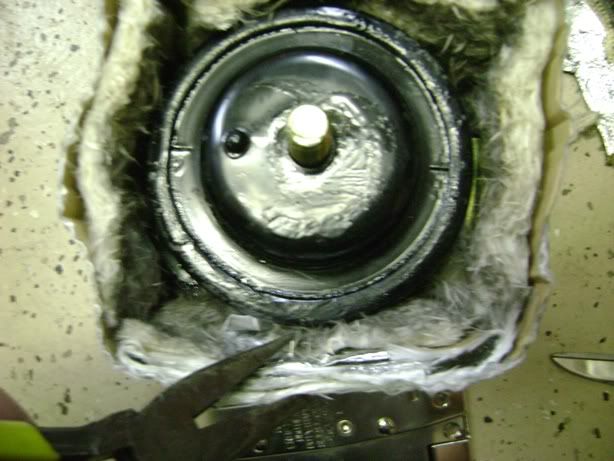 I stapled through the thickest portions trying to catch all three layers and squeezed the back end of the staples with the long nose pliers.  I placed three staples on each side as that seemed to be enough. 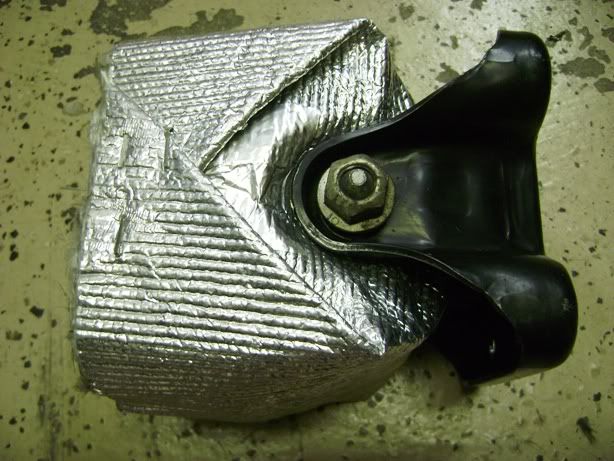 It starts to look pretty good.  Since I did not have enough material to fold and glue the edges I decided to use aluminum tape on the edge and fold inside.  As you can see on the old mounts it gets pretty hot even on the inside when the fiberglass is removed.
__________________
Craig "ZR-1 NO KA 'OI" "ZR-1 ICHIBAN" 1995 #228 Black/Black with Dunn Heads ZR-1 owner since September 2003 ZR-1 Net Registry Founding Member #0074 NCM Lifetime Member #2048
Last edited by ZBrink; 3 Weeks Ago at 06:04 AM. |
|
|
|
|
07-18-2010
|
#3 |
|
Join Date: May 2010
Location: Japan
Posts: 3,095
|
 Here are the covers off a 1990 MY with 53K miles.  Here are the completed mounts ready to install to the block tomorrow. 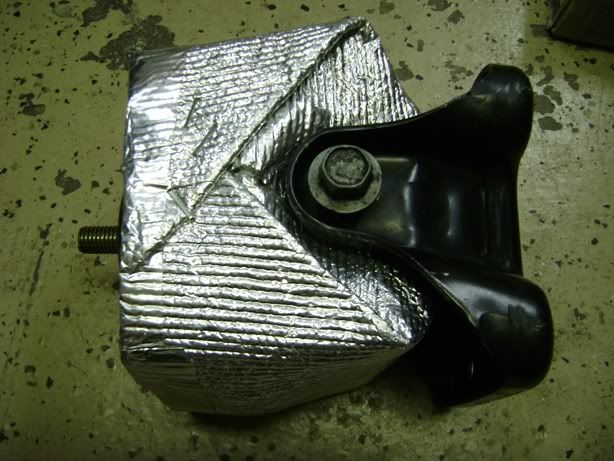 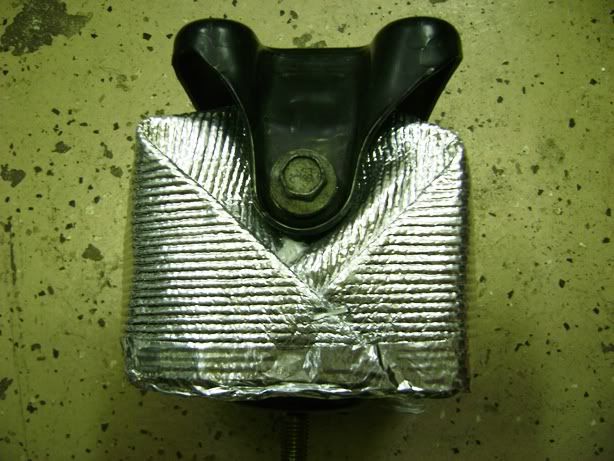  Craig
__________________
Craig "ZR-1 NO KA 'OI" "ZR-1 ICHIBAN" 1995 #228 Black/Black with Dunn Heads ZR-1 owner since September 2003 ZR-1 Net Registry Founding Member #0074 NCM Lifetime Member #2048
Last edited by HAWAIIZR-1; 07-18-2010 at 03:33 PM. |
|
|
|
|
07-18-2010
|
#4 |
 Join Date: Feb 2006
Location: Iowa aka "one big cornfield"
Posts: 339
|
Excellent!!!! Looks like a professional job to me!! Thanks for sharing, I hope this gets added to the "Solutions" link that Dynomite has going.

|
|
|
|
|
07-18-2010
|
#5 |
|
Join Date: May 2008
Location: Mauriceville, Texas
Posts: 179
|
Looks great.
|
|
|
|
|
07-18-2010
|
#6 |
|
Join Date: May 2010
Location: Japan
Posts: 3,095
|
Thanks for the comments guys and glad to share if it can benefit someone; I think I searched for the OEM part number for about a month and gave up. Sorry about the yellowish tint to the photos as I work in the garage and flash does not seem to work well. I have the garage door closed with air conditioning on so no natural light and don't have any windows.
Today the timing chains have to be installed along with the heads so wish me luck with that. Stage I SGC camshafts are on the way.......  There are only a few things in life that are more enjoyable than working on the Z. There are only a few things in life that are more enjoyable than working on the Z. Aloha!
__________________
Craig "ZR-1 NO KA 'OI" "ZR-1 ICHIBAN" 1995 #228 Black/Black with Dunn Heads ZR-1 owner since September 2003 ZR-1 Net Registry Founding Member #0074 NCM Lifetime Member #2048
Last edited by HAWAIIZR-1; 07-18-2010 at 03:34 PM. |
|
|
|
|
11-04-2010
|
#7 |
|
Join Date: Mar 2009
Location: Orlando, FL
Posts: 1,816
|
Excellent writeup! I need to do the same, this will help!
|
|
|
|
 |
|
|


 Hybrid Mode
