|
|
#201 |
 Join Date: Mar 2014
Location: Warrington PA
Posts: 1,914
|
Getting ready for round 2....applied way too much earlier, we'll see how this application goes!!!
all cleaned up again.....lol 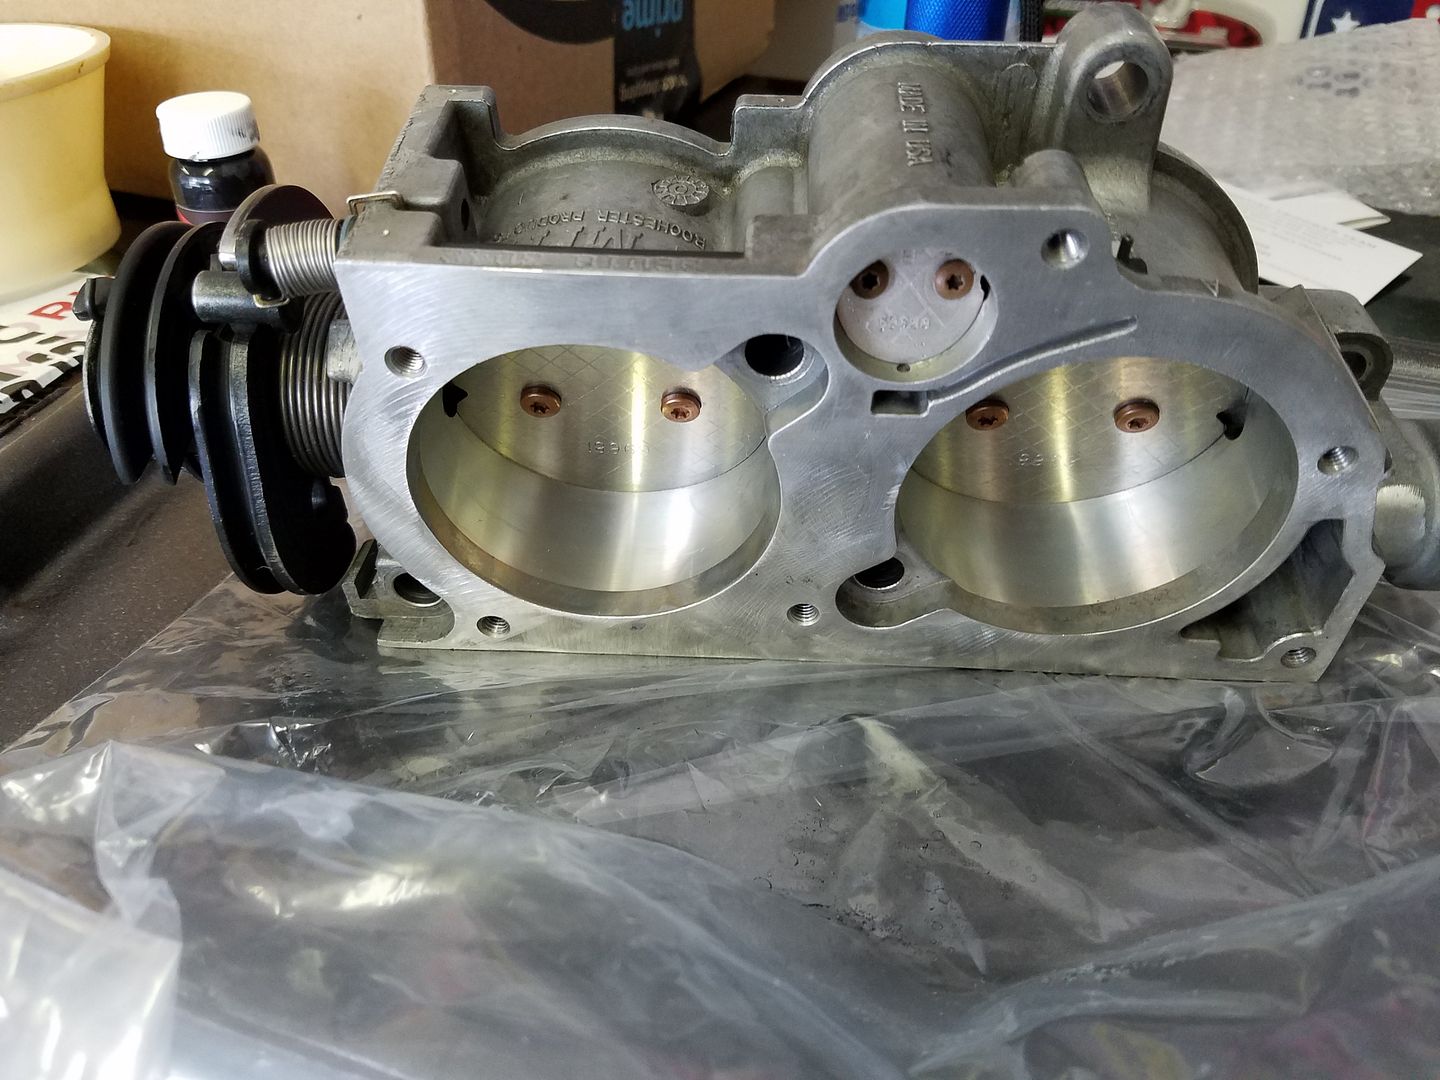 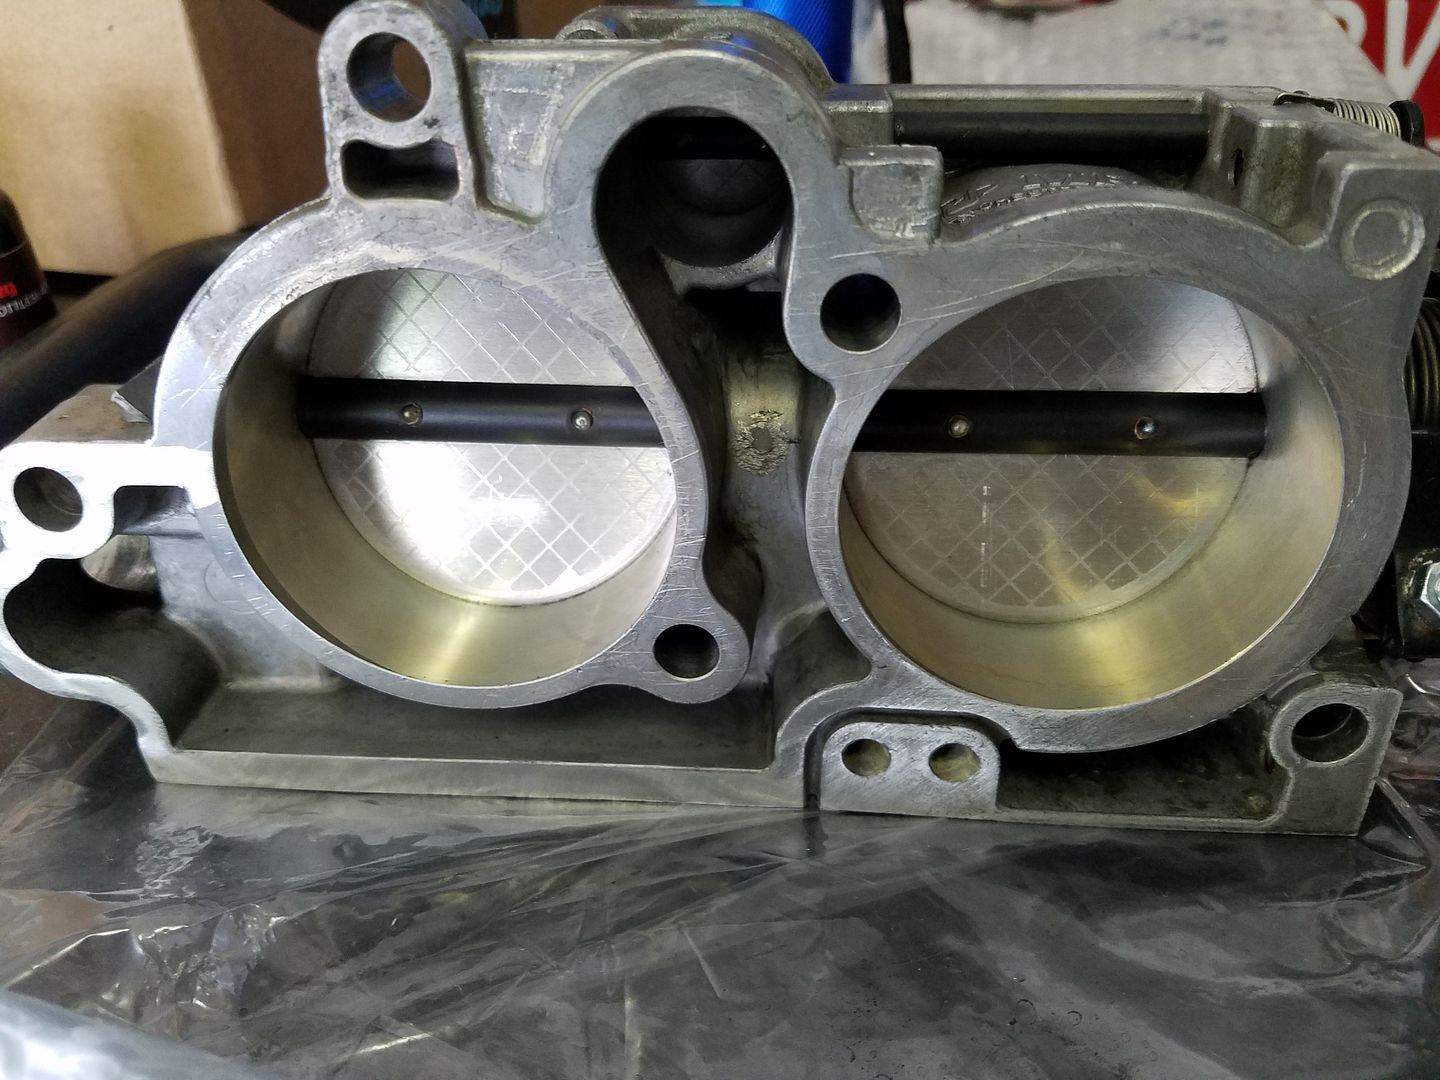
__________________
Tom 1994 ZR-1 #009 "captured test fleet car" 1974 LS4 454 Vert 1974 L-82 355 Vert. 1982 L83 CFI...now a retired "dd"....Sold WAZOO Member |
|
|

|
|
|
#202 |
 Join Date: Aug 2014
Location: Kansas City, MO
Posts: 838
|
Where did you get DAG?
__________________
Looking for a ZR-1 1985 Yamaha RZ350-NOT STOCK 1971 Yamaha AT1-Middle of a restoration |
|
|

|
|
|
#203 |
 Join Date: Mar 2014
Location: Warrington PA
Posts: 1,914
|
You have a choice of 2 suppliers that I know of, one mentioned in another TB thread and the other by another member....here they are....
http://www.laddresearch.com/catalogs.../?q=dag%20213q http://www.pontiactripower.com/shop/...ade-sealer-dag or there are other alternatives such as the CRC Brand Dry Moly Lube, also made by other companies as well..... or...another member has used.... http://www.homedepot.com/p/Blaster-5...8-GS/202597501
__________________
Tom 1994 ZR-1 #009 "captured test fleet car" 1974 LS4 454 Vert 1974 L-82 355 Vert. 1982 L83 CFI...now a retired "dd"....Sold WAZOO Member Last edited by Roadster; 06-23-2017 at 05:48 PM. |
|
|

|
|
|
#204 |
 Join Date: Mar 2014
Location: Warrington PA
Posts: 1,914
|
For those who have an interest to apply dag to your TB, here is the video I watched earlier. I was applying it correctly on the edge of the blades, but applied too much in the bore area and on the blade itself.
I will said this, that it does seal extremely well and you will have a hard time opening the blades after it dries. Just follow the instructions either on the video or whatever instructions you received from whatever vendor. I can see where it will keep the blades closed, but the trick is to apply the correct amount so that no light comes through on the secondary blades. You will need to build those areas up during the process. The dag part of the video comes in around the 4:00 minute mark... https://www.youtube.com/watch?v=rrb6HJRi5iQ
__________________
Tom 1994 ZR-1 #009 "captured test fleet car" 1974 LS4 454 Vert 1974 L-82 355 Vert. 1982 L83 CFI...now a retired "dd"....Sold WAZOO Member |
|
|

|
|
|
#205 |
 Join Date: Mar 2014
Location: Warrington PA
Posts: 1,914
|
Just to give you an idea of what the gap is on my TB with it totally cleaned, here a some pics. Now I know the general rule is to not touch the existing dag on the TB. Well with my cleaning I went over and beyond that rule.....
I reapplied the dag and after very many coatings, I finally sealed one blade inside the bore completely. Again, not the most professional application, but no light is coming through. Since some other members have used the Dry Moly Lube which I also have, I decided to do the other blade with that....two quick coats is not enough, hardly did anything as far as the buildup needed to seal the blade inside the bore to keep the light from shinning through. That being said, I need to spray more coats on the rim of the blade and inside the bore as well to try and get a good buildup of the lube. Problem is it sprays all over, I may try using a tube and just do light easy sprays to see if I can get the coverage I am looking for. Also need to buy some more Brakleen for you know what......lol before next round of dag, notice the light shinning through...  the beginning of dag....again... 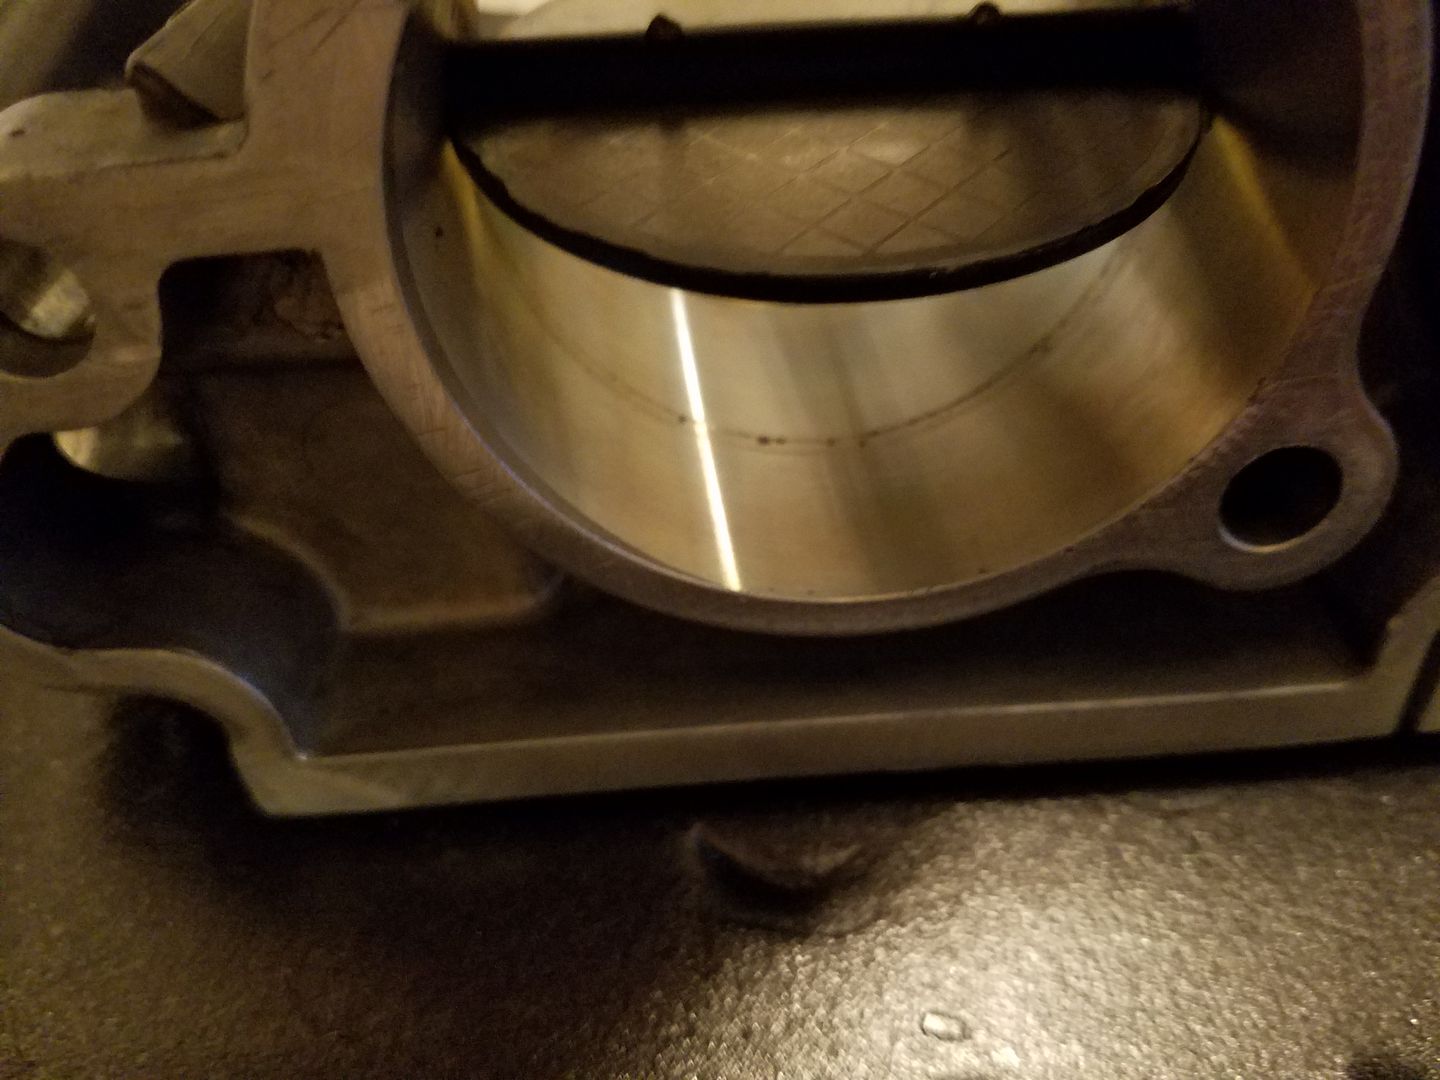 looks messy and it is...but it is sealed...I may clean up the blade some... there were a lot of coats needed eliminate the light...  the dry lube on the RS, a much cleaner look, but may take multiple buildups to achieve the same results. if it works just as good, the Brakleen comes out again and will use the dry lube. Anyway I am almost out of dag.... 
__________________
Tom 1994 ZR-1 #009 "captured test fleet car" 1974 LS4 454 Vert 1974 L-82 355 Vert. 1982 L83 CFI...now a retired "dd"....Sold WAZOO Member Last edited by Roadster; 06-23-2017 at 11:07 PM. |
|
|

|
|
|
#206 |
 Join Date: Mar 2014
Location: Warrington PA
Posts: 1,914
|
Today is mostly a continuation of trial & error. Seems like more of my trails are turning into errors......lol It goes that way sometimes.....
 Right now my TB secondary blades are "cemented" in the closed position. Part of the instructions for the dag was to leave them in the closed position after application for 24 hours, and then tap on the blades to help get them open and leave them in that position for another 24 hours. What I should have done after applying the dag was to leave them open first and then in the closed position after. I can tell you this, that if you master the technique of applying the dag the correct way, it really seal any leaks. The trick is figuring out the best way to accomplish that task. Back to the Brakleen and removal process....lol and start over, this time trying out the dry moly lube and figuring out the correct process of applying it. Since I already replaced #8 spark plug wire, I am determined to see if I can get an actual ohm reading, despite the testing already performed, which resulted in no reading. I have some thoughts and am in the process of doing them now. I tried one procedure and it did allow me to get a reading which was much higher than the other wires. Still within range, but erratic. So we shall see if this idea works. Painted and cleared the air horn to match the plenum and coolant pipes. So far, so good. Back to the garage to continue on.... inside #8 on the plug side...  some of the crud coming out of #8... 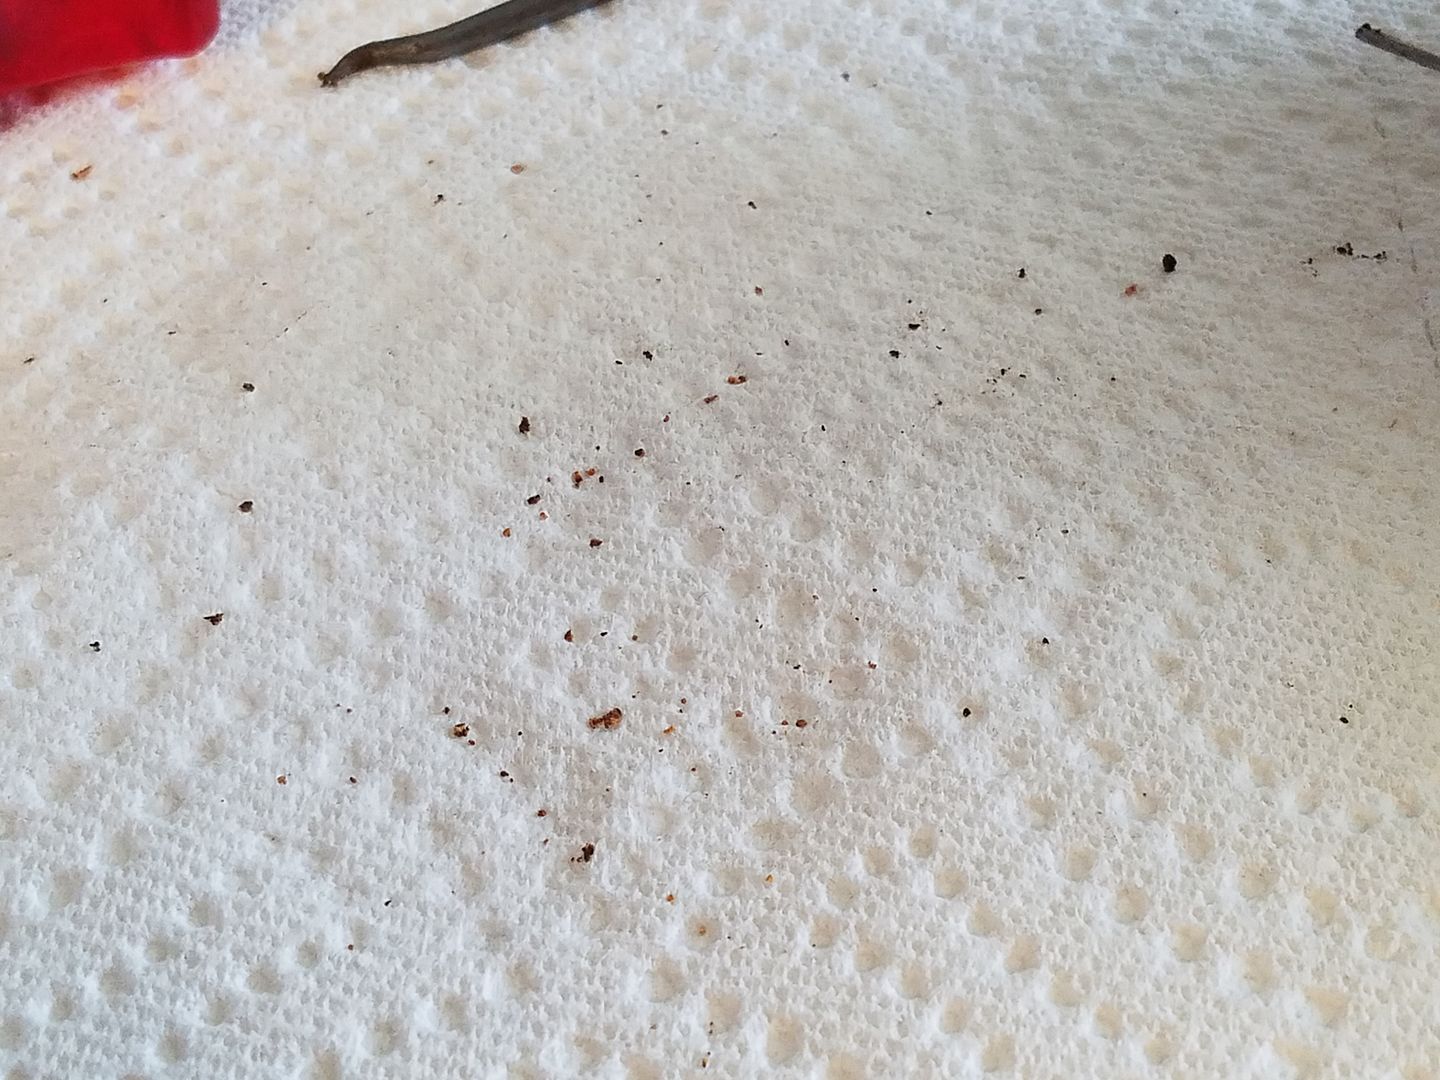 the air horn which was painted in the last few months....  now repainted again...  and cleared... 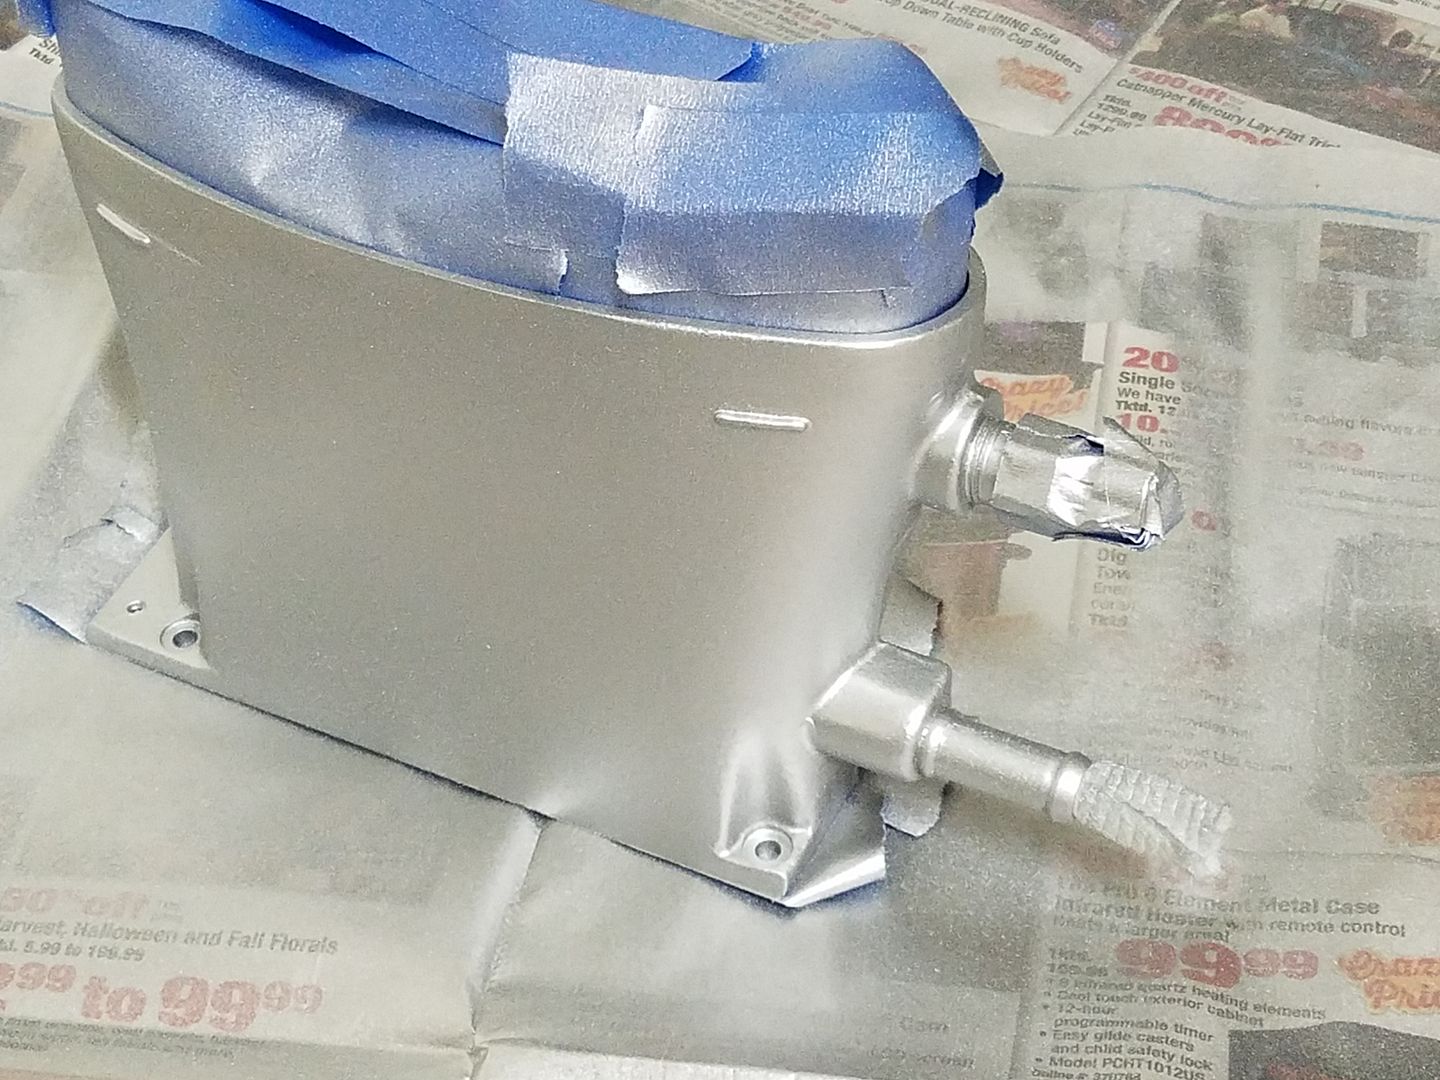 
__________________
Tom 1994 ZR-1 #009 "captured test fleet car" 1974 LS4 454 Vert 1974 L-82 355 Vert. 1982 L83 CFI...now a retired "dd"....Sold WAZOO Member Last edited by Roadster; 06-25-2017 at 02:48 PM. |
|
|

|
|
|
#207 |
 Join Date: Mar 2014
Location: Warrington PA
Posts: 1,914
|
Some conclusions from earlier......
1-Brake Kleen is your friend....cleaned the TB up again. What I noticed is that the fluid cleans the dag extremely well with little effort. Sure you need a paper towel or two to really remove any film left over. The Dry Moly Lube however IMO appears to be a "heavier" film and lays evenly because it is a spray. It is more "difficult" to remove regardless of the amount of Brake Kleen used. You need to saturate the paper towels and wiped down the bores and blades to really clean things off. So the film laid by the dry moly lube will be more effective when enough coats are applied to prevent any air leaks going through the secondary blades, compared to the dag. Again, this is JMO. If I had more dag, I would experiment more on the drying process as mentioned above to determine if that would be the correct procedure to follow. Also as per instructions with the dag, besides applying to the rim of the blades, you also want to apply (either the dag or the moly lube) to the opposite sides of the blades that open away from the bore. Which would be the front side top half of the secondary blade(s) and the back side bottom half of the blade(s). This way you will have a good buildup of film keeping the blades sealed in the closed position. I could not achieve this with using the dag, again, you just have to find the right technique using either product....These are just my opinions!!! 2-I proceeded with my idea on #8 plug wire. I did get some results getting an actual ohm reading, where before there wasn't one. The results are still not to my liking and I am trying to see if I can improve the reading even more. If so it may prove what I am thinking to be correct. We shall see!!! 3-Walmart and Staples helped me out..... Brake Cleaner is $1.94 per can, much less expensive than other stores... Staples had a sale on their air duster, which comes in handy for quick air needs. My compressor need a redo, so this was a good substitute... 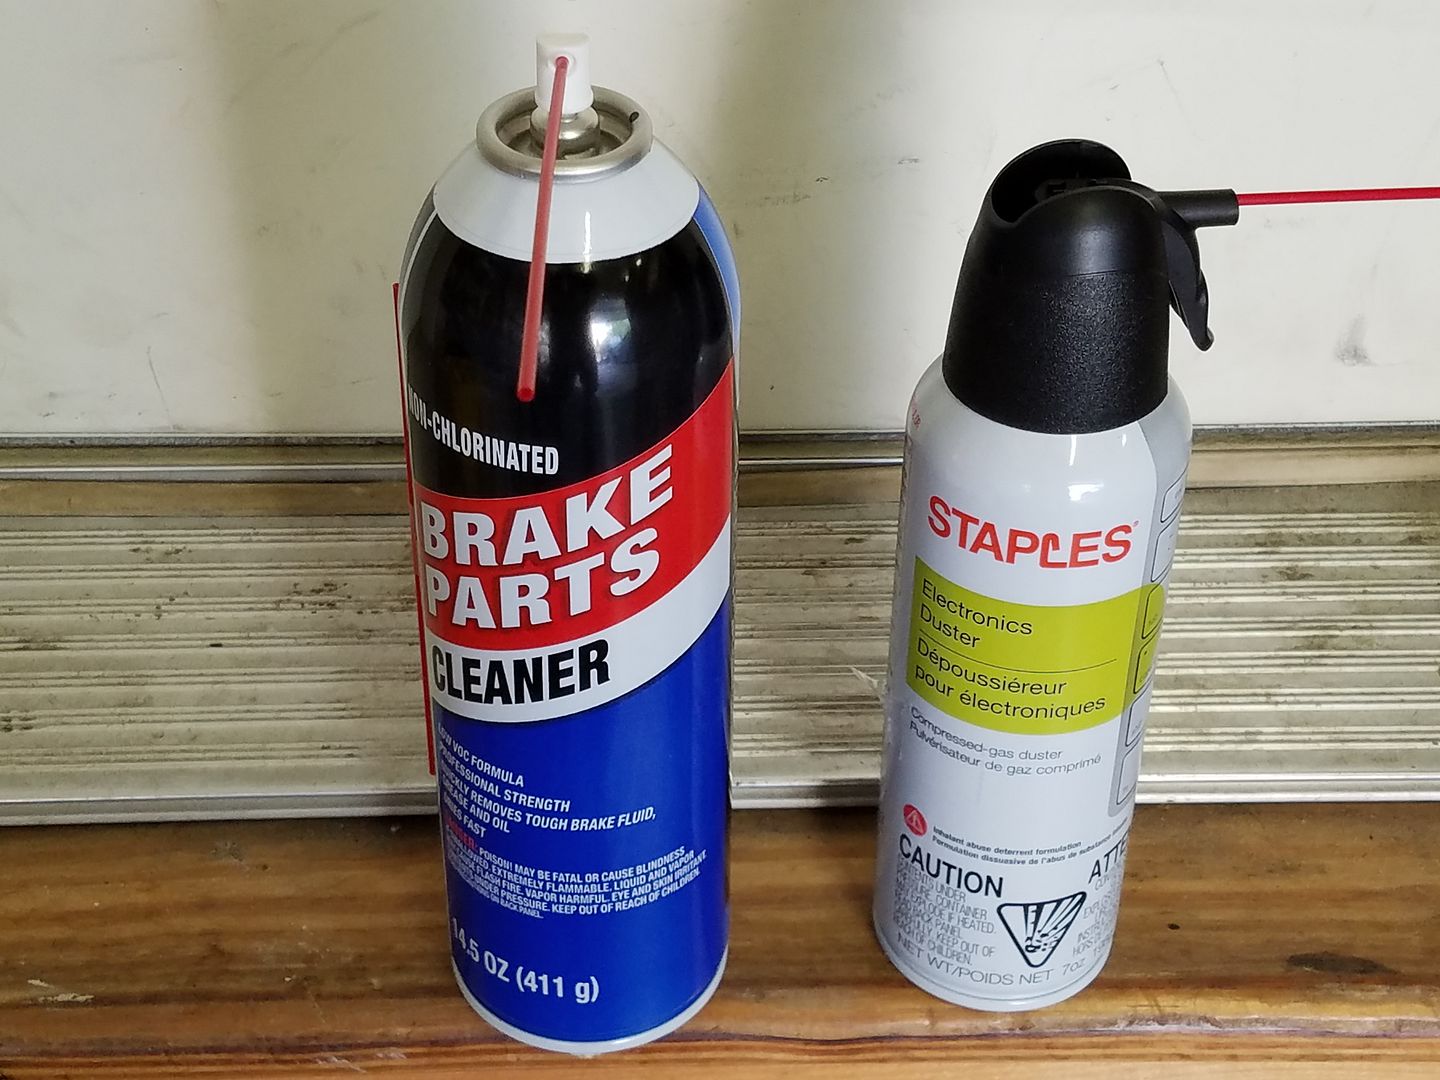 and the TB cleaned once again....lol still have some of the blade to clean.... 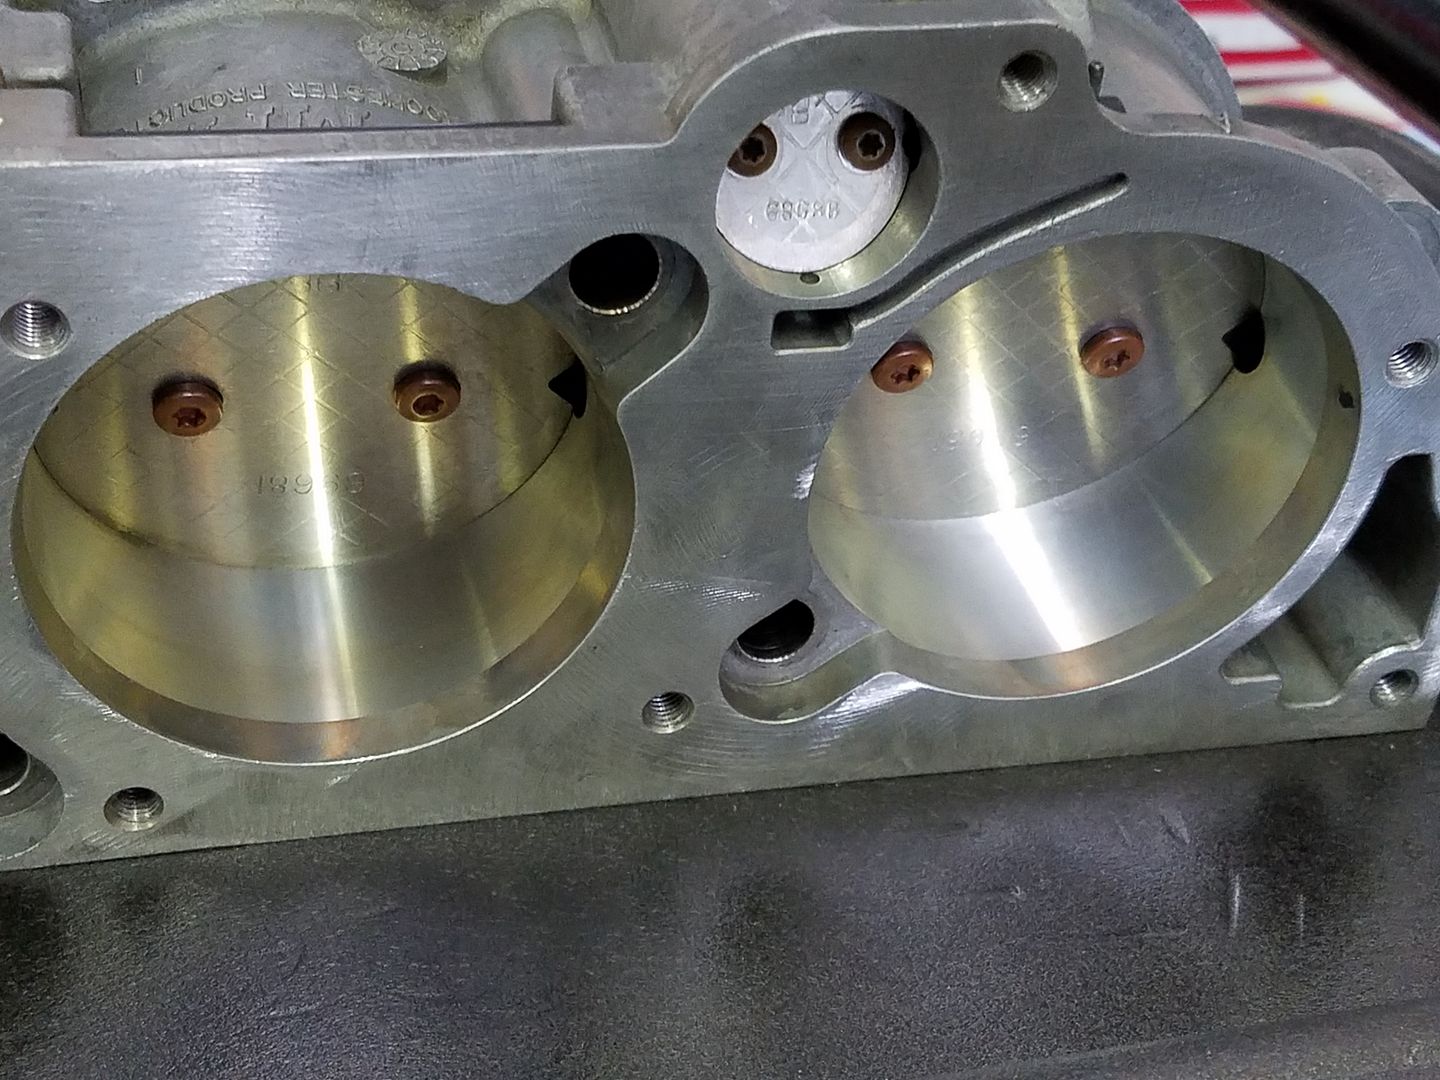
__________________
Tom 1994 ZR-1 #009 "captured test fleet car" 1974 LS4 454 Vert 1974 L-82 355 Vert. 1982 L83 CFI...now a retired "dd"....Sold WAZOO Member Last edited by Roadster; 06-25-2017 at 05:44 PM. |
|
|

|
|
|
#208 |
 Join Date: Jul 2009
Location: Texas
Posts: 793
|
Great work. I buy brake clean by the cast when ever there is a sale.That dag sure is a trouble maker. Keep up the good work
Dave |
|
|

|
|
|
#209 | |
 Join Date: Mar 2014
Location: Warrington PA
Posts: 1,914
|
Quote:
 Picking up more Brake Clean in the AM....lol Was trying to think of a way to apply the dry molly lube in an even pattern without getting it all over the TB as I did earlier. I decided that using the tube would be asking for more trouble. So, blue painter's tape to the rescue. With the TB now taped, I can spray normally multiple coats if needed (and they will be needed) lol.... and not have any go onto areas I don't want. I may even tape up part of the bores and see what happens.... Also removed the PCV tubing to give me better access to the IH's. As I intend to mask and just paint them the best that I can. This way they will match the plenum and the coolant outlets. The only main items left to paint would be the cam covers. But I am not ready to take that on at this time, so they will have to wait..... TB taped and read for the dry molly lube...and PCV valves and tubing now removed for paint... 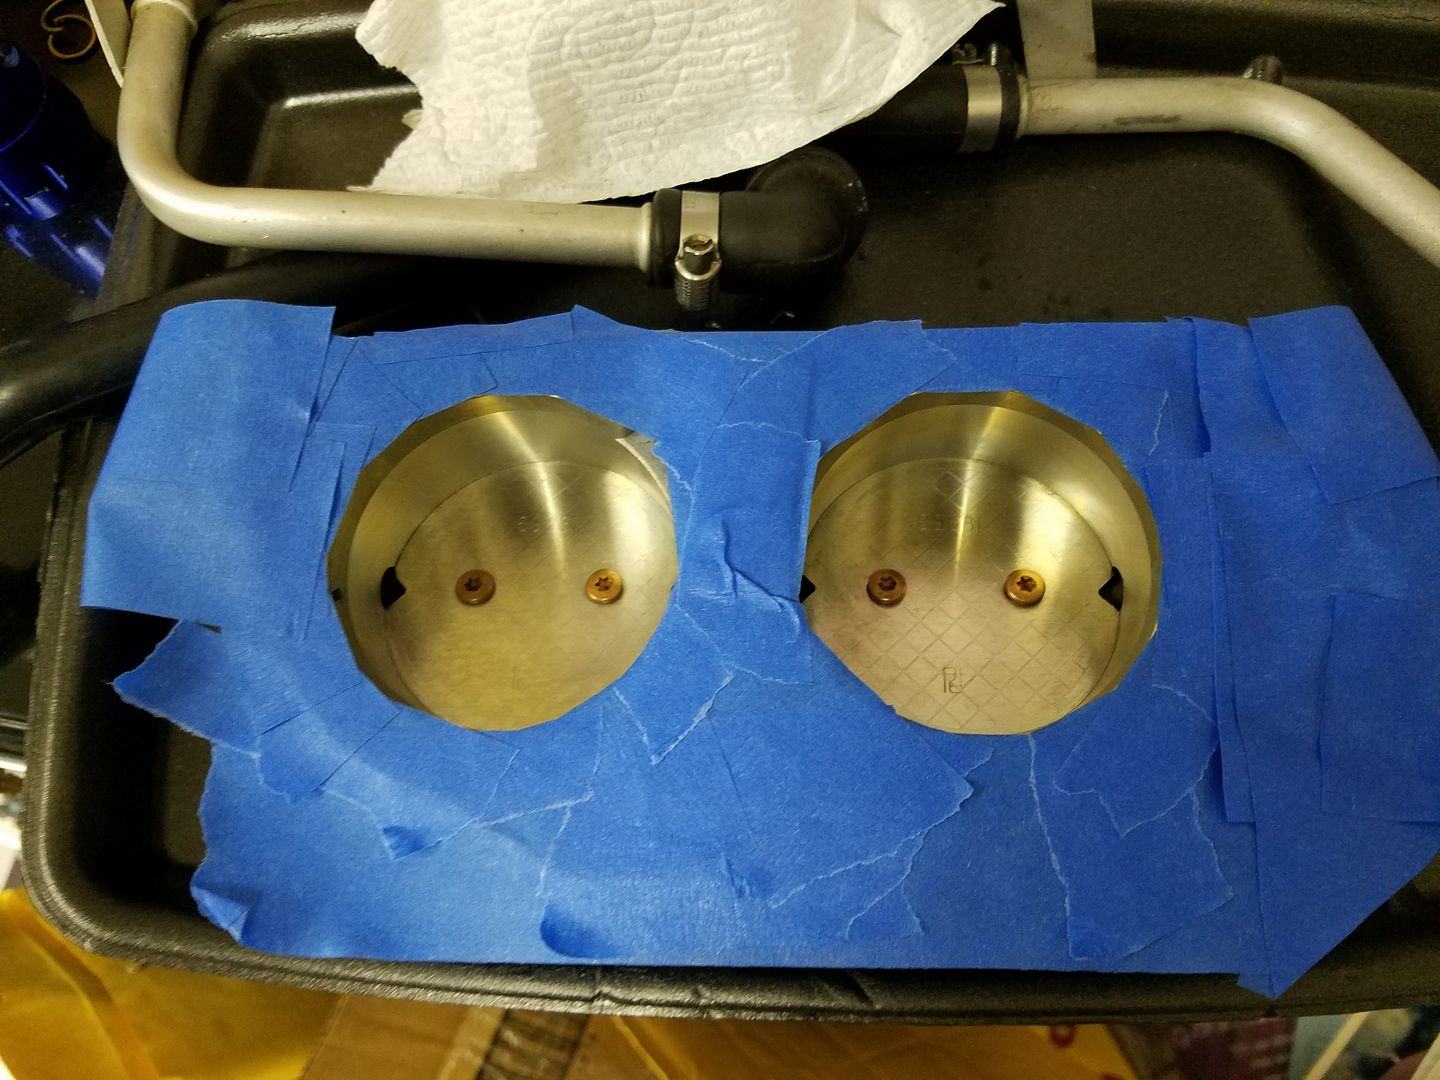 
__________________
Tom 1994 ZR-1 #009 "captured test fleet car" 1974 LS4 454 Vert 1974 L-82 355 Vert. 1982 L83 CFI...now a retired "dd"....Sold WAZOO Member |
|
|
|

|
|
|
#210 |
 Join Date: May 2010
Location: Japan
Posts: 3,587
|
Tom,
Curious to know how many times have you said "dag nabbit" during this project? Lol..... Sent from my iPhone using ZR-1 Net Registry
__________________
Craig "ZR-1 NO KA 'OI" "ZR-1 ICHIBAN" 1995 #228 Black/Black with Dunn Heads ZR-1 owner since September 2003 ZR-1 Net Registry Founding Member #0074 NCM Lifetime Member #2048 
|
|
|

|
 |
|
|