
|
 06-16-2010
|
#81 |
 Join Date: Jan 2006
Location: Niceville
Posts: 997
|
Sorry guys for being delinquent. Been busy lately. Yes I finished the install. Carter's stuff is amazing and works well. I could not find a machine shop close by that wanted the business to modify the stock stuff and Carter offered to help. AMAZING.
I've tried to put some miles on the car. It is everything I wanted. I also lowered the car about an inch and a half all around. Looks great. I'll get a write up soon. Big 40 is this Saturday and we are having a blow out party. So maybe after. Ted |

|

|
|
06-16-2010
|
#82 |
 Join Date: Dec 2005
Posts: 692
|
  Happy Birthday Ted. |
|
|
|
|
06-17-2010
|
#83 |
 Join Date: Aug 2006
Location: McLean, VA
Posts: 3,705
|
Happy Birthday!
|
|
|
|
|
06-17-2010
|
#84 |
|
Join Date: Jul 2007
Location: Bartlett, IL
Posts: 7,137
|
Happy 40th Vader!!!!
__________________
1990 Corvette ZR-1 #1051 Watson Headers (2" Primary) - 3" Magnaflow Bullet cats - LT4 Catback Late Model IH - Plenum Coilovers - 4.10s Custom Interior NCM Lifetime Member #978 |
|
|
|
|
06-21-2010
|
#85 |
|
Join Date: Jul 2007
Location: Bartlett, IL
Posts: 7,137
|
Any pictures of the rear mount yet?
__________________
1990 Corvette ZR-1 #1051 Watson Headers (2" Primary) - 3" Magnaflow Bullet cats - LT4 Catback Late Model IH - Plenum Coilovers - 4.10s Custom Interior NCM Lifetime Member #978 |
|
|
|
|
06-21-2010
|
#86 |
 Join Date: Sep 2005
Location: Washington
Posts: 955
|
back at post #66
|
|
|
|
|
06-21-2010
|
#87 | |
|
Join Date: Jul 2007
Location: Bartlett, IL
Posts: 7,137
|
Quote:
__________________
1990 Corvette ZR-1 #1051 Watson Headers (2" Primary) - 3" Magnaflow Bullet cats - LT4 Catback Late Model IH - Plenum Coilovers - 4.10s Custom Interior NCM Lifetime Member #978 |
|
|
|
|
|
06-22-2010
|
#88 |
|
Join Date: Jan 2006
Location: Niceville
Posts: 997
|
Before
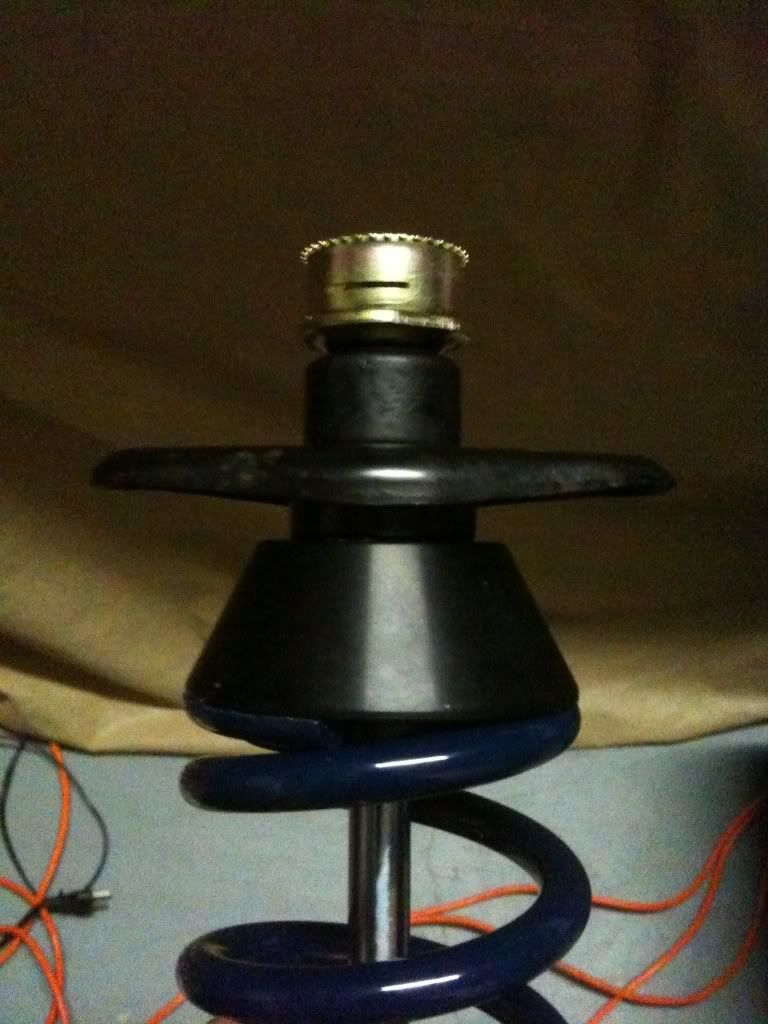 modified bracket (must open frame to fit) 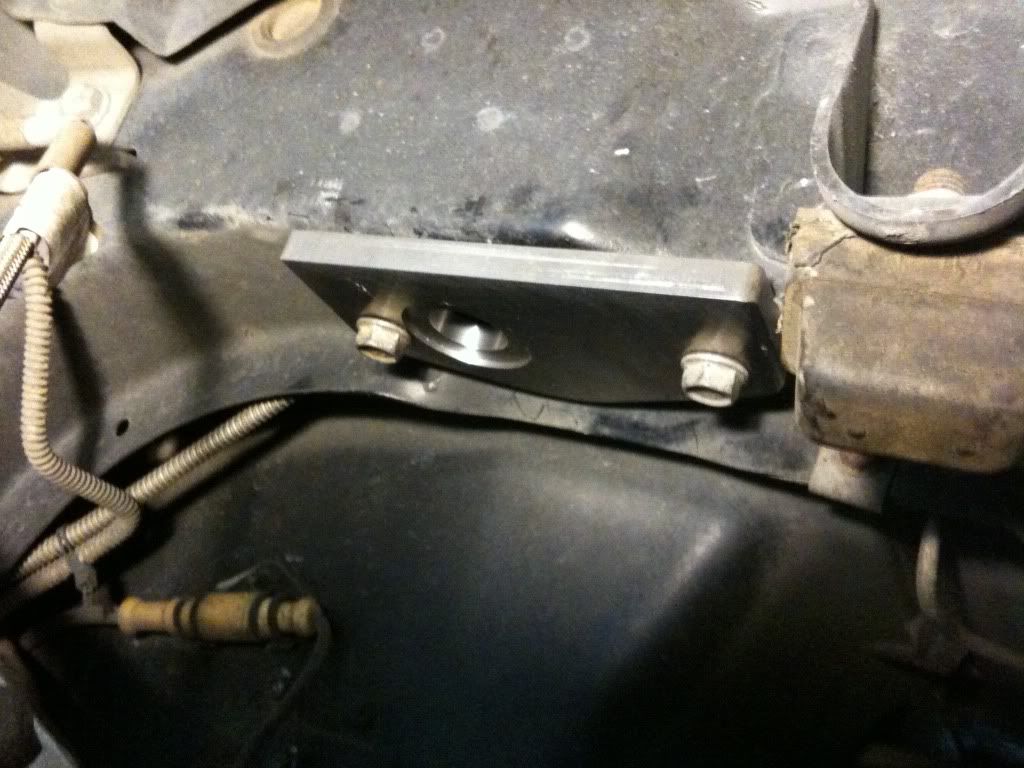 had to shave top urethane bushing to fit gear on with increased thickness note offset 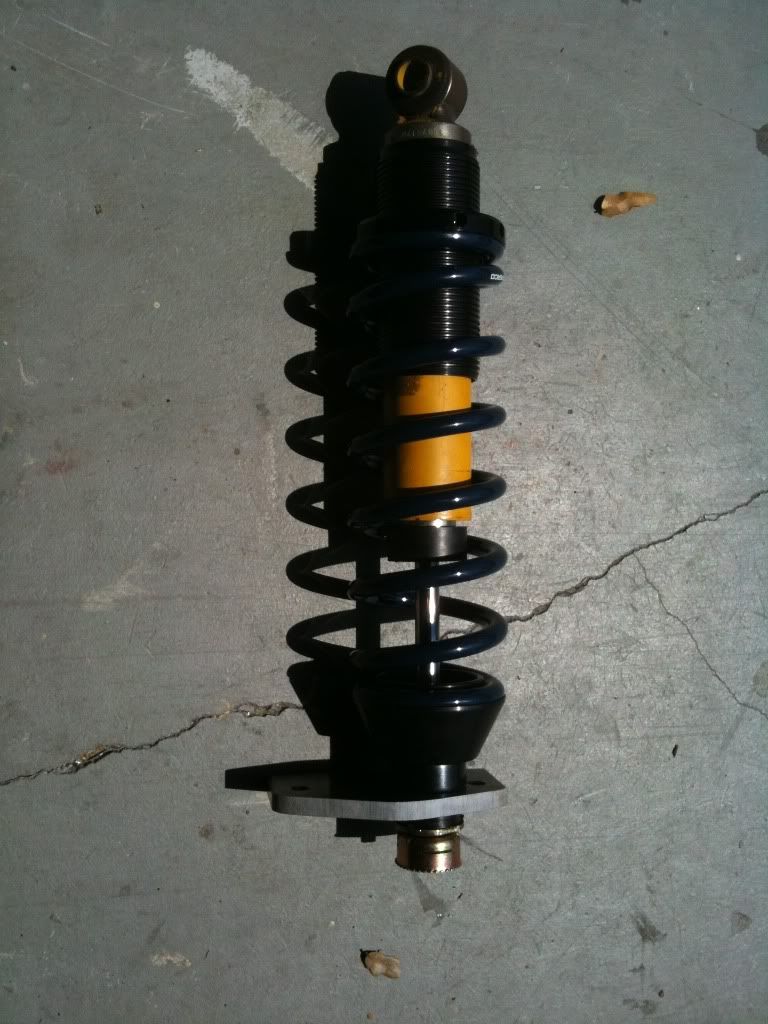 I'm on the road. This is from iPhone. Will completely detail when I return. Ted installed 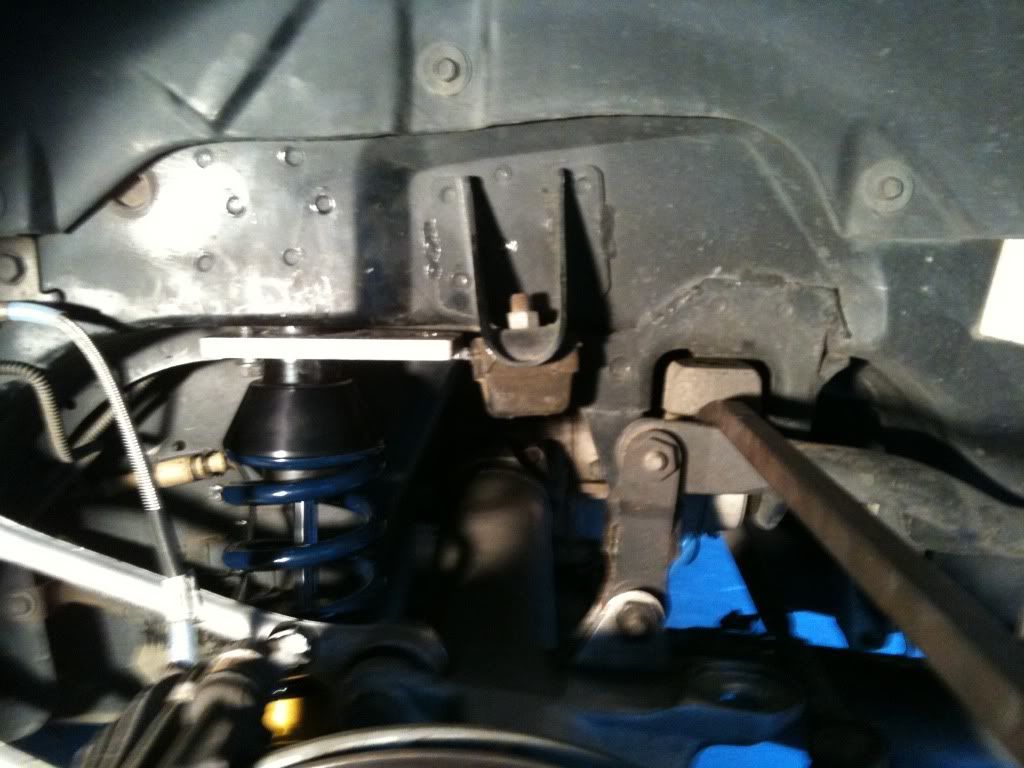
|
|
|
|
|
07-05-2010
|
#89 |
|
Join Date: Jul 2007
Location: Bartlett, IL
Posts: 7,137
|
So you have instructions for the mounts from Carter yet?
__________________
1990 Corvette ZR-1 #1051 Watson Headers (2" Primary) - 3" Magnaflow Bullet cats - LT4 Catback Late Model IH - Plenum Coilovers - 4.10s Custom Interior NCM Lifetime Member #978 |
|
|
|
|
07-06-2010
|
#90 |
|
Join Date: Jan 2006
Location: Niceville
Posts: 997
|
The Coil Over Installation Process
Jim Milstead, DRM and JeffVette all contributed to the pre-process. The following links are where I started. Rears[/URL] click the link then replace the *s with CF spelled out Fronts[/URL] click the link then replace the *s with CF spelled out So, good start. I did not like some parts of it. In comes Carter. Here's where I departed and some lessons learned. Get the car on jacks as high as you can. Remove the old stuff per the service manual. You will need a puller to remove the tie rods and spindle in the front. *****TIP***** Remove the lower and upper A-arms completely. It will help remove the spring and then spread out the mount. I had all of the old stuff removed in about two hours. It took two months to get it back together. *****TIP***** Have all of the parts necessary prior to starting. Carter has a tremendous start on this--now. I did not want to cut into my front frame area. Carter made these mounting devices and I replaced the stock sway bar mounting brackets with Energy Suspension brackets (see picture) from Autozone for a 1inch sway bar. 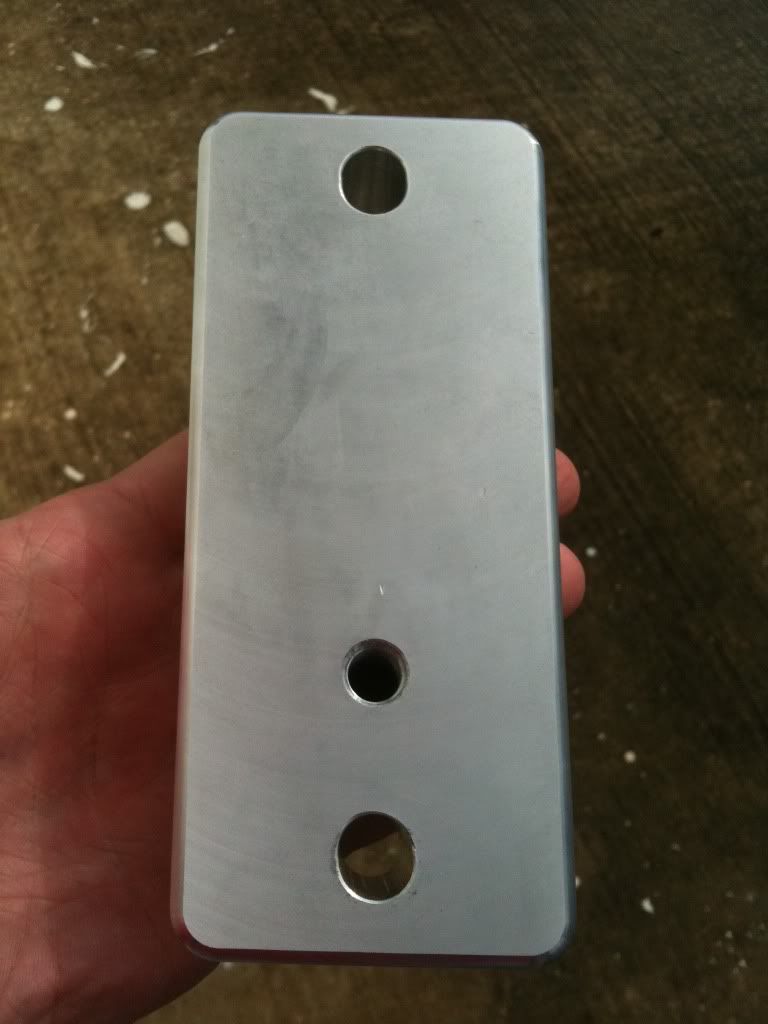 The stock bolts will not do to mount into the frame. You need bolts long enough to go through the block into the frame. Size is 10mm x 1.5 pitch. Two long for the outsides and one smaller for the inside (threaded). You can see how I did it here:  *****TIP***** Fronts are fairly straight forward. Now for the fun--Rears. You will need to mill the head and reverse the suspension mounting bolts per Milstead's thread above. Get a pry bar. I did not like the weld then drill method for the old mounts--did have the resources. Carter made some great mounting brackets but they require shaving the upper urethane bushing. I figured it only mounts the gear and the bracket and bushing insert take up the slack. *****TIP****** Get a dremel with a quick attachment cutting wheel. After I figured this out I was done in an hour. Use it to open the rear frame area. I did not have the necessary tools or experience to accomplish Milstead's write up opening. It also would have required removing most/all of the rear suspension. I used a grinding bit on an air compressor small grider to round the corners. Here's what I did: Old New Carter's Bracket 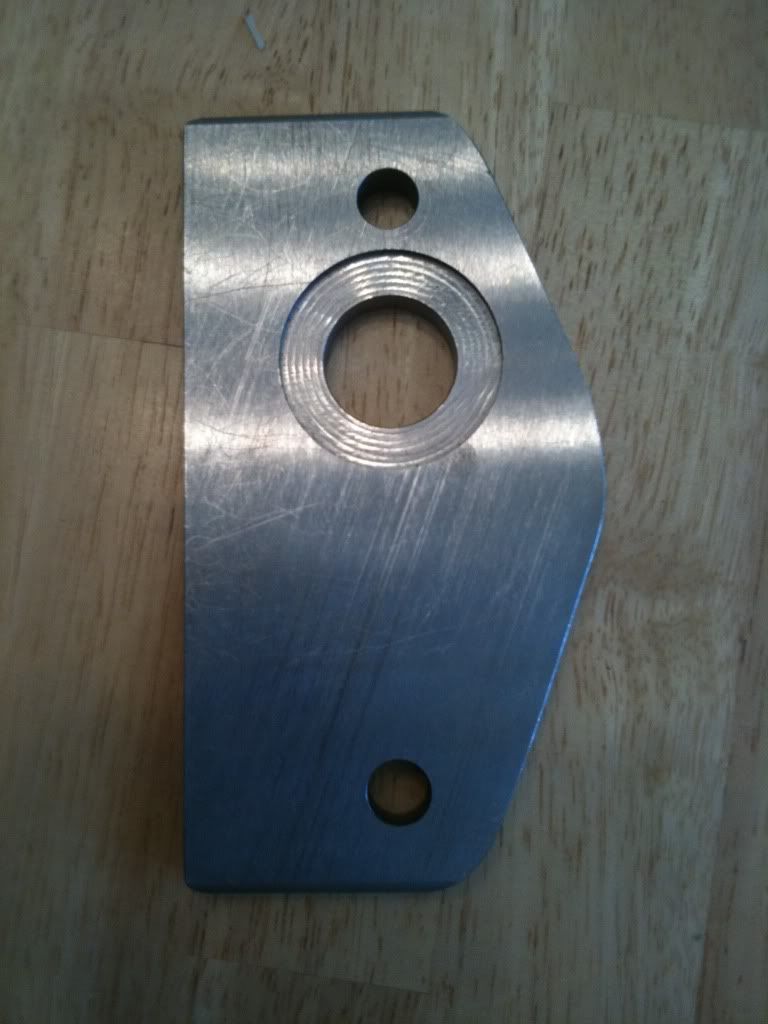 Mounted on frame: Ted |
|
|
|
 |
|
|


 Linear Mode

