
|
|
|
 10-19-2008
|
#1 | |
|
Join Date: Oct 2005
Location: Candy Apple...yUmMy
Posts: 1,137
|
Quote:
|
|

|

|
|
10-19-2008
|
#2 |
 Join Date: Jul 2007
Location: Bartlett, IL
Posts: 7,137
|
Yeah but LGAFF has NO Head Bolts.. that is the issue
__________________
1990 Corvette ZR-1 #1051 Watson Headers (2" Primary) - 3" Magnaflow Bullet cats - Borla Catback Late Model IH - Plenum Coilovers - 4.10s Custom Interior NCM Lifetime Member #978 |
|
|
|
|
10-19-2008
|
#3 | |
|
Join Date: Oct 2005
Location: Candy Apple...yUmMy
Posts: 1,137
|
Quote:
|
|
|
|
|
|
10-19-2008
|
#4 |
|
Join Date: Mar 2007
Location: Crystal Lake, IL
Posts: 7,194
|
OK here is the skinny on the block/heads.
Engine is out of 90 #702. I bought the heads, they were ported with a valve job. The short block has about 40K miles on, although it seems like it has more). Notice the port is siamesed, and althought the 2ndry port is over 36mm the primary port needs to be opened some. Also notice that the porting left little sealing surface area where the IH bolts on. Last edited by LGAFF; 03-02-2018 at 07:37 AM. |
|
|
|
|
10-19-2008
|
#5 |
|
Join Date: Mar 2007
Location: Crystal Lake, IL
Posts: 7,194
|
The Pistons have damage from a screw...apparently the culprit was never found, but he either had partners or possibly bounced around from cylinder to cylinder:
There is however no damage to liners. LGAFF 92 ZR1 #234 Last edited by LGAFF; 03-02-2018 at 07:46 AM. |
|
|
|
|
10-19-2008
|
#6 |
|
Join Date: Mar 2007
Location: Crystal Lake, IL
Posts: 7,194
|
The only known other issue is the cross threaded bolt for the IH:
 LGAFF 91 ZR1 #234 |
|
|
|
|
10-19-2008
|
#7 |
|
Join Date: Mar 2007
Location: Crystal Lake, IL
Posts: 7,194
|
Step one in inspecting the block, etc was the removal of the balancer.
In order to hold the crank still, I placed a large head screwdriver in the crank position sensor hole, the crank has several notches in it, used for holding the crank still during cam timing. There is actually a tool that is inserted here that snaps into the notch and holds the crank still, but more to come on that. After locking the crank I removed the crank/balancer bolt. Crank position sensor hole: 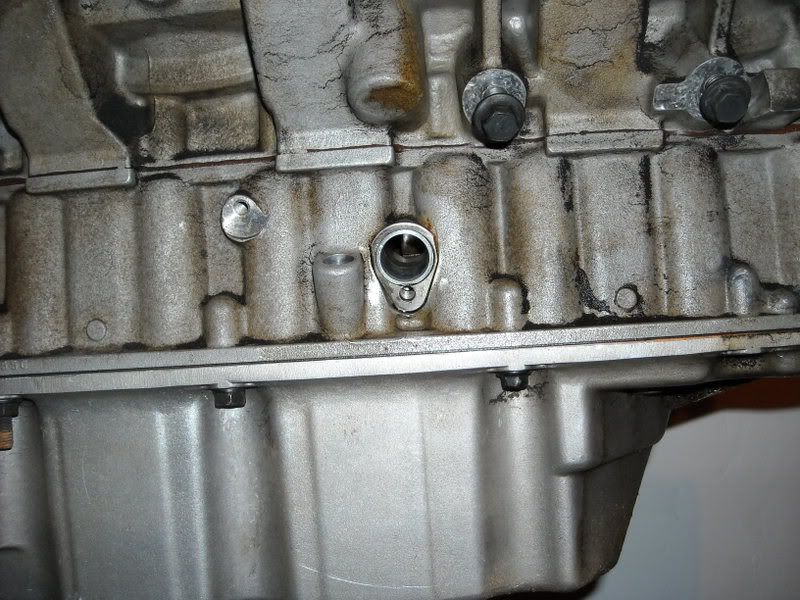 Then removed the balancer: 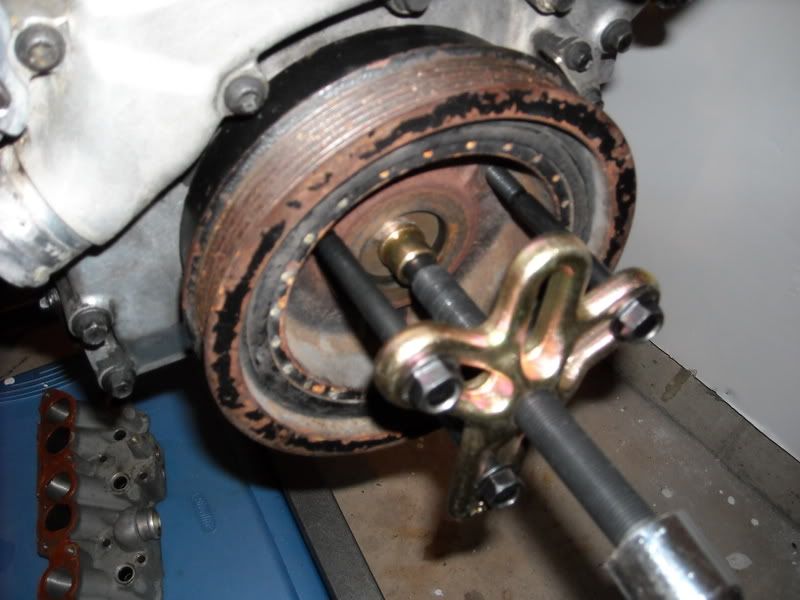 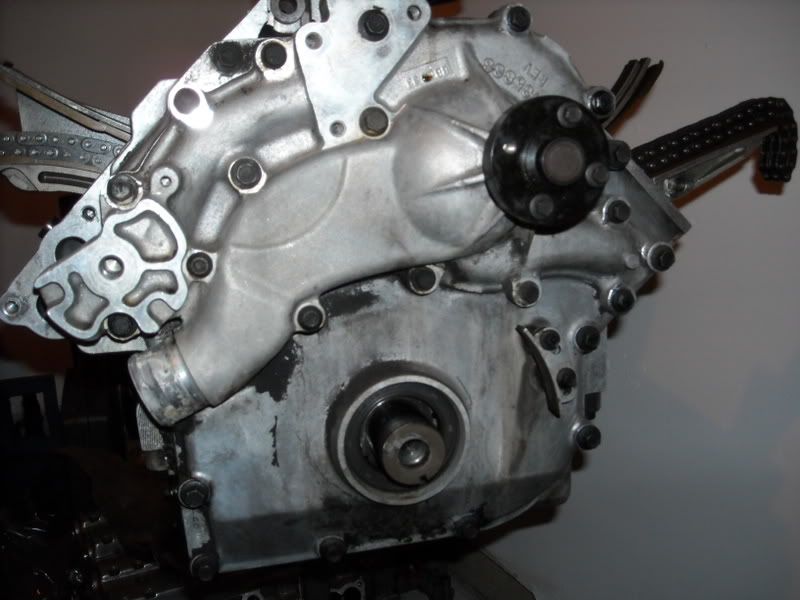 LGAFF Last edited by LGAFF; 10-19-2008 at 08:24 PM. |
|
|
|
|
10-19-2008
|
#8 | |
|
Join Date: Oct 2005
Location: Candy Apple...yUmMy
Posts: 1,137
|
Quote:
|
|
|
|
|
|
10-20-2008
|
#9 | |
|
Guest
Posts: n/a
|
Quote:
So you are forcing roughly 160+ ftlbs of pressure on the crank reluctor wheel? |
|
|
|
|
10-20-2008
|
#10 |
 Join Date: Dec 2003
Location: Arcadia,OK
Posts: 3,376
|
Seal remains in place in the front cover when it's removed. Word of caution, be careful with the large metal "washer" on the crank. The face is a precision lapped flat surface for sealing against the carbon/graphite oil pump seal. If it is dinged or scratched, the oil pump seal will leak.
__________________
Jerry Downey JERRYS LT5 GASKETS & PARTS http://www.jerrysgaskets.com 1994 ZR-1, Black/Black, Lingenfelter Aerobody, 416cu in, 3.91 gears, coil-over susp, Brembo brakes, etc. 2016 Black-Red, 3LT-Z51 Auto 8-speed. |
|
|
|
 |
|
|


 Hybrid Mode
